Tuesday, July 24, 2018

Aftermarket details: 1970s style racing sponsor logo decals and a 1/10 scale fire extingusher

I've finally gotten to the stage of applying decals to the Sand Scorcher. For a quick, fun build it's been a long time coming!


I decided that even though I was building a modern re-release, I really wanted to replicate the original 1979 issue as much as possible. The original Sand Scorcher was all about replicating the Baja racers in the 1970s, so it had authentic 70s logos plastered all over it. When Tamiya re-released the Scorcher in 2010, they updated the decals to avoid copyright issues - they look similar, but instead of the real-world "Jackman Wheels' they designed a very similar logo for the fictitious "Joker Customs".

Not for me. Hell, this whole thing is a serious nostalgia trip, so modern fakey sponsors are a no-no.

So I purchased a set of aftermarket decals from MCI Racing in Canada - link here. These replicate the original decals, which are now pretty much impossible to find.


I'm very happy with them - if you are considering MCI Racing decals, I would wholeheartedly recommend them.


On a less positive note, I bought a 1/10 scale fire extinguisher from a random Chinese seller on ebay. It cost less than AU$3, including postage to Australia - all I can say is you get what you pay for. The extinguisher has a massive gap where the two halves meet, and there is a big fingerprint in the red paint. Very disappointing...


That's a big ol' thumb print in the paint there.

And that's an even bigger ol' seam gap...


It's satisfying to finally see the end in sight. I have my LiPo batteries charged and ready to run - hopefully this weekend!

Cheers,

Dave


Friday, July 20, 2018

New video: A perfect glossy paint finish is really hard to achieve!

In my latest video I show you just how badly I'm doing trying to achieve a beautiful, glossy, flaw-free finish on the paint job for my Sand Scorcher. It's pretty damn frustrating.


Painting gloss paint on models is really hard to do!


I hope that this video doesn't come across as self-pitying or whiney. I tried to be humble and show that even self-appointed "YouTube experts" still stuff things up sometimes! Plus I have a total new respect for automotive modellers.

I would love to say I have the solution - that I can give you hints and tips on how to achieve the perfect gloss paint coat for your scale model cars... But I can't. I have had no luck at all.

Have a look and feel the frustration..

Video is embedded below, but in case that doesn't work here is the link:
Painting gloss paint on scale models is REALLY hard to do!

Cheers,

Dave


Friday, July 13, 2018

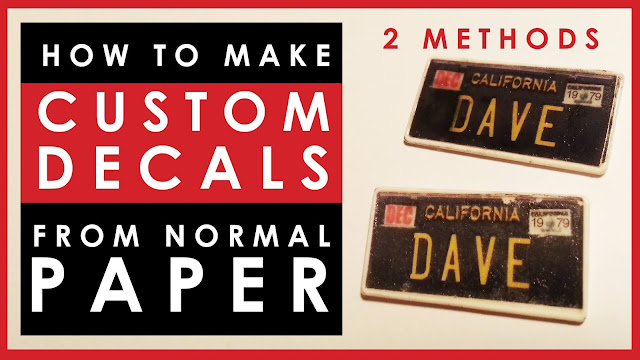
New video: How to make custom decals for scale models using plain paper (not decal paper)

In my newest video I show you how to make your own custom decals using plain white printer paper - no expensive decal paper for me! It's a great technique to have up your sleeve for when you only have one or two little decals and don't want to waste an entire sheet of decal paper, or for when you want a particularly weathered looking decal.


How to make custom decals for scale models using normal paper (not decal paper)


Now I'll say up front: there is a trade-off involved. There are pros and cons.

Pros:

  • Cheap - almost free!
  • Less waste if you only need a couple of decals
  • Fast and easy
  • Gives a pre-weathered effect
  • Kinda fun to experiment with


Cons:

  • Not as perfect as a waterslide decal
  • Some fading, less vibrant colours
  • Method #2 will have a raised edge, so only use that when you can hide the edge of the decal/sticker

The results are not perfect like a normal waterslide decal. But it's a good trick to have up your sleeve and it might be just the thing to get you across the line some day. Plus it's just cool to know and play around with.

It does assume you are able to design your own decal and then reverse it - I recommend Photoshop, but I'm sure there are many free design programmes out there if you don't have access to Photoshop.

I also show you a second technique in the video, which is much more like producing your own thick stickers rather than fine decals. Again, there are pros and cons involved, but it's good to have in your repertoire.

Video is embedded below, but in case that doesn't work here is the link:
How to make custom decals for scale models using normal paper (not decal paper)

Cheers,

Dave


Thursday, July 12, 2018

Amazing submarine model maker


It's not often I post other model makers' videos on my blog, but when I find something extraordinary I love to share it. This model maker's submarine dioramas are most definitely worth sharing.


Lee Hon-Wei makes the most incredible dioramas of subs I've ever seen. Check out his methods in the embedded video below.

Cheers,

Dave


Wednesday, July 11, 2018

Masking the Sand Scorcher for painting

I've been busy masking off areas of the Sand Scorcher to paint its complex blue and white colour scheme. The body shell is currently all painted in Tamiya TS-26 Pure White, and now it's time to start layering on the French Blue sections. There are some pretty complex curves that need masking - it's easily the most boring part of the entire build so far...


Luckily I recently bought some Tamiya 5mm masking tape. It's really pliable and hugs the curves well. If I was trying to do this just with plain old buff masking tape, I'd be in a world of pain.

That white roll is the Tamiya masking tape.


Almost ready to paint. Now I just have to cross my fingers that none of the blue seeps under the masked off areas, as I imagine trying to remove any stray blue from the pure white areas would be an absolute nightmare.

Cheers,

Dave


Sunday, July 8, 2018

Painting the driver of the Sand Scorcher

Just a quick update today. I was lucky enough to have three solid hours of modelling time yesterday, and as part of that I finished painting the face of the 1/10 scale Sand Scorcher driver.


I think he looks suitably relaxed. Perhaps a tiny bit too mellow for driving a rally bug around Mexico, but hey, it's the 1970s and he's south of the border, who knows what illicit substances he's indulged in?

Cheers,

Dave

Friday, July 6, 2018

New video: Do you ever combine alcohol with scale models?

In my latest video I discuss whether it's ever smart to combine booze and building scale models. This week I rather stuffed something up because I thought it would be a good idea to try airbrushing at 9:30pm after two pints of beer and a glass of wine. Hmm, turns out it was actually not a very good idea at all.


Do you ever drink alcohol while building scale models?
Pictured: not a very good idea.

A few weeks back, while I was still building The Seahorse, I recorded a video after I had had a couple of drinks, and I was very tempted to get stuck in and do some paint chipping. On that occasion I was smart enough to know my limitations, and I walked away from the workbench.

I hadn't released that video before now, as I wasn't sure it was professional enough to release.

After my stuff up this week, I reconsidered my position, and recorded some more video to bookend the original footage with, where I had a slightly more sober reflection on the issue.


Do you ever drink alcohol while building scale models?


Have a look and let me know your thoughts. I'm keen to hear other modellers' ideas on this topic. Goodness knows I could learn a thing or two if that dented helmet up top is anything to judge by...

Video is embedded below, but in case that doesn't work here is the link:
Do you ever mix alcohol and scale models?

Cheers,

Dave


P.S. Remember kids - don't drink and model.

dont drink and model

Tuesday, July 3, 2018

Working on custom licence plates for the Sand Scorcher

I really want my Sand Scorcher to feel as close as possible to the 1979 original release, even though mine is a 2010 re-release. As part of that, I wanted to customise the licence plates on the Sand Scorcher, so I fired up Photoshop and got stuck in.


The licence plates on the original 1979 model had moulded-in raised lettering, while the 2010 re-release simply has a decal that you apply to a flat plate. It's not quite the same. Plus the new plates have a 2010 year on them - well, that simply won't do! That's not nearly 1970s enough!

My decals from the 2010 re-release.


Pretty uninspiring, huh? Compare that withe the originals from the 70s.

Personalised licence plates for my Tamiya Sand Scorcher RC model using Photoshop.
These are the original 1979 moulded plates. Source.


I found a good free licence plate font online, and got to work. As well as making them look more retro, I decided to personalise them. This was my first thought, and I like it - it's the winner so far:


Personalised licence plates for my Tamiya Sand Scorcher RC model using Photoshop.


But then I got a bit... ummm... "creative", and tried to come up with something a little more interesting, something that captures a little more of that crazy 1970s feel. You know, the weirdo California I've spent too long racing cars in the Mexican desert kinda vibe.

And that was when I came up with these two:

Personalised licence plates for my Tamiya Sand Scorcher RC model using Photoshop.


Personalised licence plates for my Tamiya Sand Scorcher RC model using Photoshop.
The less said about these, the better.


Hmmmmm...

In my defence, it was quite late in the evening when I did these two... I don't think these are in the running. But if any of you readers have a better idea for a personalised plate for a 1970s VM Baja Bug - please, comment below or get in touch! As you can tell from the above, I'm obviously clutching at straws here!

Cheers,

Dave
(a.k.a. "Funky Dave")


Monday, July 2, 2018

A glossy scale model paint job is really, really hard to achieve

I thought I was a pretty good model maker. I've been doing it for a loooong, long time. I thought I knew how to paint models. But I was wrong.


You see, I normally paint tanks and aircraft, and I likes me some weathering. My absolute favourite subject is something that is beaten up, dirty, rusty and semi-derelict. That's perfect for tanks and sci-fi. Even my aircraft are fairly weatherbeaten and well-used - no factory fresh machines for me.

Which is why, when it came time for me to paint the glossy paintwork of the Sand Scorcher, I completely ballsed it up.

On a tank, if you screw up a section of paintwork, you can always hide it with mud, or dirt, or stowage. On a glossy car, if you screw up a section of the paintwork, there is nowhere to hide.

On Saturday I thought I would paint the white basecoat of the Scorcher. I grabbed my rattlecan of Tamiya TS-26 Pure White and went to the backyard. It was a little windy. I went ahead with it anyway, because it is Winter here in Australia at the moment and I only get to airbrush or spraypaint on weekends, it's too dark and cold when I get home from work on weekdays.


I managed to get a lot of dust and grit in the paint. And then a bug flew into the side of the car, and got stuck in the paint. Let me give you some rookie advice: removing the bug with your thumb and then thickly spraying more paint on to cover the smear will not work. The prosecution presents Exhibit A.


I did a terrible, terrible job. Look at the massive blobs where I tried to cover up flaws...


And that is why the Sand Scorcher body is currently sitting in the laundry tub, coated in a thick layer of oven cleaner, waiting to have that first coat of white scrubbed away...


I have a newfound respect for automotive modellers. Those glossy cars are hard.

Cheers,

Dave