If you're ever at a loose end, feeling uninspired with whatever miniatures you are making, I recommend building something fun and low-stress to get your model making mojo back. Think of it as a palate cleanser.
We've all felt it. You don't feel inspired to make anything. There's "nothing interesting" in that ridiculously large and expensive stash of unbuilt model kits you own ;) Or your regular subject just doesn't seem to catch you any more.
This video might just help. It has some suggestions at the end which certainly worked for me.
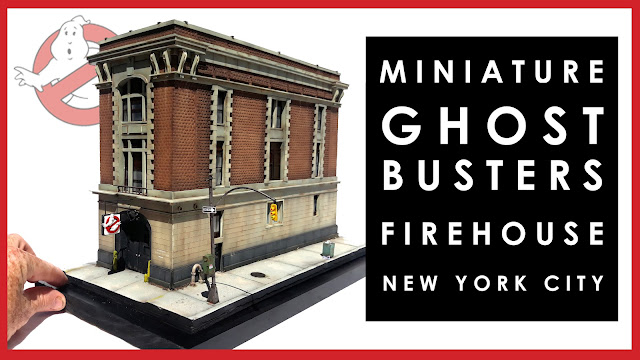
This week I completed my latest miniature: a collector commissioned me to make the iconic Ghostbusters HQ building from the cult 1984 movie "Ghostbusters". The real building still stands in New York City - it is a NYFD Hook & Ladder Company firehouse.
Who ya gonna call? ;)
I didn't work to a particular scale (although it ended up being around 1/50 scale) - instead, I knew the rough final dimensions I wanted the completed miniature to be, so I drew up blueprints to match that final size. I used Google satellite view to get the basic dimensions, and then filled in the details using stills from the film, contemporary photos of the building I found online, and Google streetview. I designed this using InDesign, because I used to be a graphic designer and I know the program well, but any CAD or design software would work. Once I had the plans, I started building.
It's such an iconic structure, I had a lot of fun making it. I won't tell you the whole story here - instead, watch the video to get the detail!
Goodness it's been a long time between drinks. Six months since my last Youtube video...
To be honest, I've been focussing intently on producing actual physical miniatures rather than documenting it all for video. The process of recording and editing videos is unexpectedly time-consuming, and I made a conscious decision last year to concentrate more on producing artworks rather than videos.
Which doesn't mean I don't still read all the comments you guys leave, and respond to 95% of them. I promise.
So here's my latest video, which charts the building of my latest miniature - Blunt's Boatbuilders here in Melbourne.
Goodness it's been a long time between posts. I mostly put that down to the fact that I was preparing for an art exhibition of my miniatures, held in an art gallery here in Melbourne. The exhibition, "SMALL ACTS" was the culmination of just over a year's work, showing ten miniatures of buildings and urban scenes I love here. Attendance was phenomenal, with about 1000 people coming to view the works.
In these times of Coronavirus and national lockdowns, a lot of people weren't able to make it along. Plus I know a lot of you are international followers, not in my home town. For all of you, I've put together a video walkthrough of the exhibition.
It was very gratifying to see people so enthralled with my work. It's been consuming my time for the last few months in particular, so it was wonderful to see people's reactions to it.
This week I discuss the famous 1:8 scale Bugatti kit by Pocher. It's been described by many as "the most beautiful model kit ever released", but does it live up to the hype?
It's certainly awe inspiring, partly just because of the massive 1:8 scale size of it - it's about 55cm long!
The details are phenomenal. The windows wind up and down. It has a working handbrake. Apparently when put together correctly, you can even see the cams turn in the incredibly detailed engine.
Am I impressed? Yes. Is it the most beautiful model ever? Watch the video to find out ;)
This week I'm working on a new scratchbuild of a large Masonic temple, as well as completing a small abandoned shopfront. I also discuss my latest kit purchases, a Wingnut Wings DH.2 in 1/32 scale and a 1/48 Revell Ju88. Plus, scratch building is just the best.
Blimey, I've been rather quiet lately. I've been in the zone, utterly concentrated on building a commissioned miniature of a local warehouse. Because I've been so intent on that project, and I had a rather tight deadline to work to, I didn't record the process as comprehensively as I have recently.
As a result, my latest video is composed of still photography rather than video - you still get narration, and a pretty solid idea of how the build progressed, but it's not quite as comprehensive as my recent 3-part series on building a model house.
I've not really built much in 1/35 scale recently, but as the client wanted the entire structure, including the interior, I had to choose a scale which would give a reasonably-sized final result. This ended up being about 40cm deep, which is about the maximum size I want any of my miniatures to end up. Any larger than that and it is just too bulky to display for any average person. Plus, in choosing 1/35 scale, I was able to use a Tamiya bicycle kit for one of the interior items, which saved me from having to entirely scratch-build a bicycle - phew!
I added a few elements like brake lines, wheel reflectors, etc.
In this final episode of my 3 part series on how to scratch build a modern building, I go through building the base and groundwork, as well as accessories such as trees, pot plants, fences, gas meters, etc. It's pretty satisfying to see it all come together!
In Part 1 I built the main, frontal structure. In Part 2 I constructed the rest of the building, including the side stairwell and the backing section. Now in Part 3 it all gets a base and the surrounding garden.
My favourite part was combining the natural front garden with the straight-edged architecture - this mix of organic and inorganic is really interesting to me. Making the two work together requires a deft touch!
Here's Part 2 of my three-part series showing you how I construct a miniature building. In this video I show you how the main structure all comes together, as well as starting on some of the detailed architectural features like the front porch.
At the end of Part 1 this is what the building looked like:
And here's where it is now:
As you can see, a lot of the overall shape and detail has been added. There are so many textures and angles and sub-assemblies on this build, it's really a challenge in organising myself.
Add to that the fact that it's not a very weathered or dilapidated house like I normally build, and I'm finding this build an exercise in discipline. I can't hide any mistakes under a layer of dirt or peeling paint. I can't cut wonky angles and just say to myself "Oh it's an old place, it's worn away there". I miss the wear and tear, but I'm enjoying the self-discipline required for this one.
Part 3 next week will be all about the groundwork and garden, so come on back then for that.
Over the last few months I've had a lot of people ask me to video step-by-step what goes into making one of my miniatures. So with my latest I've decided to do just that.
I'm currently building a commission piece, of a specific house here in Yarraville. It's a lot more modern than what I have previously built, and it doesn't have much weathering, peeled paint or falling-down stuff. So this is a bit more of a challenge for me, to make something more pristine - I don't have the safety net of being able to cover up any mistakes with dirt or grime!
The original house.
I expect this will be a three part series. In this Part 1, I build the front structure of the house. It's not a particularly systematic approach, I just happened to start with this section first.
As you'll see, there are no incredibly tricky techniques involved - it's all a matter of planning, measuring and having the patience to see it through.
Keep an eye out for Parts 2 and 3 in the next weeks.
Here's my latest miniature - the Footscray TV & Hi-Fi Repair store. It's a building near where I live, and I love it. the paintwork is so weatherbeaten, the signwriting is so faded, that I just couldn't resist recording it in miniature. Plus, as an added extra, I've confronted my electronic ignorance and added internal lighting, wooooo!
Here's a comparison of the miniature and the actual building.
The building itself was a pretty straightforward build, even if time consuming. But when I was doing my final photography of the completed artwork, I somehow shook loose a desk inside the room. It was rattling around on its side, and the entire building was all sealed up...
So as you'll see in the video, I gritted my teeth and opened up the roof. There are some uncomfortable noises during this process - some coming from the miniature, and some coming from me.
However, I decided that since I was ripping the roof open I may as well try illuminating the interior, because as it was all that beautiful scratch built detail just wasn't visible in the dim interior. So I went to my local electronic bits and pieces store (is there a better term for that???) and confessed my ignorance to the guy there, and he drew me a great and idiotptoof diagram. As a result, I now have a shopfront with an illuminated interior - yay!
Hurrah, it worked!
It just goes to prove you can teach an old dog new tricks. (As long as you spell it out in very simple terms...)
Last weekend was the 2019 Australian Model Expo, showcasing the best scale models in Australia. There were some cracker entries this year.
There were over 880 entries - as such, it's a long video! I have broken it up into categories as follows so you can jump to those areas that interest you:
00:38 Aircraft
15:56 Armor & Dioramas
35:38 Figures
39:32 Sci-Fi & Fantasy
47:44 Automotive
50:35 Ships
51:58 ...and the rest
55:56 People's Choice and Best in Show
I've just completed my current commission piece, the 5 Brothers Cuban sandwich and grocery in Key West, Florida.
This was commissioned to be a very shallow build, so it could be framed and hung on a wall.
You can see how shallow the build is in this view.
I was asked to replicate how it looked in the 1980s - the business is still there, you can check it out on Google street view here - so I had to go by old photos I could find online, similar to what I did with the Olympic Doughnuts van. It's not as hard as I imagined. Pretty much any iconic building has enough old photos freely available out there. We live in extraordinary times.
I recently completed my miniature of the iconic Olympic Doughnuts van which stood outside Footscray train station here in Melbourne for 30 odd years. It was a Melbourne institution, which sadly was removed during a station upgrade about eight years ago.
The miniature is in 1:20 scale, and is mostly constructed from Evergreen plastic card.
Because the original is no longer there for me to measure and record, I had to work from photos available online. This was a bit of a challenge, but in the end I think I captured the original.
It was a pleasure to build this and capture a little piece of lost history.
Here's my latest video, it's a long one! In it I go step-by-step on how to create a natural miniature diorama of a chopping block tree trunk. It's in-depth, showing that literally anyone could make this - there are no phenomenal skills or techniques involved.
The scale is roughly 1:15 or so - it was guided more by the base than any specific measurements.
The only really unusual bit is the use of aluminium cooking foil to give size, strength and a basic skeleton for the sculpture.
You guys know me. I like to save money where I can when building models. I'm always banging on about not wasting money on single-use tools or the latest gizmo. Usually this advice is sound, but sometimes you encounter so much grief and frustration trying to use a workaround that it makes sense to cough up and buy the proper tool. Trying to neatly and cleanly cut foam is one of those times.
For months I avoided purchasing a hot wire foam cutter. I know you can make your own, but my electrical skills are dodgy and I didn't want to burn my house down. So I used workaround solutions. And the results weren't pretty. I believe the term "butchery" is used in this video.
Am I happy with it? You betcha. Every time I use it, it makes me smile because I'm not swearing at the terrible results I previously achieved!
Here's my latest video, showing you how to scratch build your own old-school metal trash cans for scale model dioramas. Perfect for adding a sense of grit and grime to any streetscape! I show you mine built in 1:20 scale, but in the video I also give dimensions to make these in 1:35 scale as well.
It's a very satisfying technique. I won't lie, it's fiddly and tricky and time-consuming, but the results are well worth it.
Full disclosure: I first saw this technique in a Facebook photo tutorial by a modeller named Luc Po. So all credit for the technique must go to him. I just thought that the world could use a video tutorial, it's a lot easier to follow, and here it is.
Video is embedded below, but in case that doesn't work here is the link:
This week is a follow up to last week - today it's all about the easiest way to paint rusted metal. Honestly, it's almost impossible to stuff this up. Plus it's another one of those fun, random, not-quite-sure-how-it-will-look-until-its-completed processes that I love so much.
It's incredibly simple.
Paint something with random splotches of Tamiya Red Brown XF-64.
Then splatter on speckles of other shades of reddish, orangey, brownish tones.
Then judiciously apply rust pigments.
Voila! You now have a piece of rusty metal.
There's really not a lot more to it than that - yes, there's room to finesse it, and of course feel free to play around with the technique, but it's pretty hard to mess it up. I love a process that can't go wrong!
I received a few queries last week, asking me how I had painted the roofing in my corrugated iron video. So I'm releasing two videos in response - one showing how to paint a weathered, galvanized natural metal finish (this week) and next week I'll be showing you the easiest method ever for painting rusted metal.
For a galvanized metal finish, all you need is:
a dark metallic paint
a light metallic paint
a light grey paint
salt
That's it. Easy-peasey.
I'll let the video do the talking, but I think it gives a suitably realistic and weathered finish. The spots of darker metal could be slightly smaller to be more in scale, but I can live with it.
I've been playing around this week with a new gizmo, and it gives amazing results. It's a tool for making scale corrugated iron sheets. Normally I don't like to waste money on single-use tools, but I've been spending lots of cash on corrugated styrene sheet and I realised that there had to be a better solution. Now I can make as much corrugated roofing as I want at a tiny, tiny cost.
I was starting to muck about trying to form my own scale corrugated iron using the corrugations inside cardboard... it wasn't effective.
I saw a couple of online tutorials about making your own tool. Hmmm, possibly...
Then I found this. It's from a hobby shop here in Melbourne, and they invented it themselves. For $20 it looks and performs much better than anything I could have jerry-rigged together, so I grabbed one. And I'm very, very happy with it. (You can kinda tell in the slightly overexcited video - I think I need to get out more...)
It was invented by Brunel Hobbies, and is available from their website - Brunel Hobbies.
By the way, this is in no way a paid recommendation - I have not received any commission, and I paid for my tool like a normal person. When I do find something good, I like to share it with you guys.