Monday, July 31, 2017

Another hobby store closing down here in Melbourne

It seems 2017 is a bad year for hobby shops here in Melbourne. On Friday I got an email from Metro Hobbies telling customers that they are closing down their city store in Swanston Street.


It's due to a metro rail redevelopment in the CBD, and their building is being compulsorily acquired. Apparently they tried to find a replacement city location, but it was too expensive. They are not going out of business entirely, they are keeping their suburban Box Hill store open, but as this is 31km from where I live it's not exactly helpful to me.

This may be the last time I head up these steps...

Behind this uninspiring (and slightly out of focus) door lies a world of Good Stuff.


I was hoping to pick up a bargain, as the city shop has all model kits reduced by 30% until the close up in September. Sadly, I didn't find anything I wanted to buy.  If I'm being honest, this is more of a comment on the size of my "to be built" stash I already have, and is less of a comment on the range stocked by Metro Hobbies!  I really do have enough kits to last me a decade of sustained building at the snail's pace I build at...


Yeah, I can't really state that they don't have much in stock.


An ongoing trend


When I first moved to Melbourne in 2006, I was pleasantly astounded by how many model shops were in business here compared to Sydney. my home town. In Sydney there is one hobby retailer, HobbyCo. It is what you would expect from a monopoly - lack of competition means expensive prices and less choice. Sadly, I think this is the direction we're headed in Melbourne now.

Just a couple of months ago Hobby HQ in Thomastown closed up for good.

In the last couple of years, we have lost Hobby Place in Lonsdale Street (the owner was grumpy and unpleasant to deal with, but a double-shopfront of modelling goodness was inside!)

We also lost a great hobby shop in Little Bourke Street, Showcase Models Australia. It concentrated on military models, and prices and range were amazing, but the owner suddenly died in around 2015-16 and his widow was forced to close up shop.

Back in about 2008 a model shop in Moonee Ponds also closed due to the death of the owner.

There is a definite pattern here...

Leaving aside hobby shops which specialise in radio control, this really only leaves three players in town by my reckoning:


  • Hearns Hobbies in the city
  • Battlefield Hobbies in Yaraville
  • Metro Hobbies in Box Hill.


Tough times for the hobby, and sadly between the ongoing colossus that is the internet, and the average age of hobby shop owners, I can't see this getting any better.

If you know of any places I've overlooked, please do let me know.

Cheers,

Dave

Friday, July 28, 2017

Been a bit quiet

I've been a little quiet on the blog this week, as I was approached to write an article for a modelling magazine. I can't reveal much before it is published, obviously, but it has meant most of my modelling output has been focussed away from the current project this week.


But it's all done and submitted now, and it is almost the weekend meaning some modelling time is hopefully just around the corner, in which case:


Cheers,

Dave

Tuesday, July 25, 2017

So what did I think of "Dunkirk"? It was extraordinary.

Last night I saw "Dunkirk" at the cinema. It was, quite frankly, amazing.


I saw a 70mm projection version at the Sun Theatre in Yarraville, so it was a big, rich, visual feast.

Source.

The film itself


The film is just so immersive. You feel as if you are present. It is cold, wet, stressful, anxious and horrifying. I spent 90 minutes feeling on edge, waiting for the next disaster to occur. If you have ever read a history book, then you know how the big-picture story unfolds. But the human lives focussed on in the film are each an individual tragedy unfolding in real time, and that sense of being there, of experiencing it as the soldiers, sailors and airmen experienced it, is visceral.

The music is also extraordinary. There is a constant motif of a ticking watch, perpetually reinforcing the sense of time running out for the men on the beaches.

It really is an extraordinary experience to see this on the big screen. Go and see it, you won't regret it.

What I expected


I expected lots of tanks, and ground battle. Nope. Not a single shot of a tank.

I expected a lot of big-picture, grand strategy, theatre of war in peril stuff. Apart from the very ending, there was none of this. It is an intimate film. Even the scenes with thousands of men lined up on the beach were focussed on individuals, if that makes sense.

I expected to love the Spitfires. And I did.

I expected lots of "stiff upper lip" officer types. Leaving aside the fact that Kenneth Branagh doesn't seem to have any lips at all, there was a refreshing lack of stereotypical British officers.

Really, check it out, he has no lips at all.  Source.


What I didn't expect


I didn't expect to viscerally feel cold, and out of breath, and feel my heart pounding.

I didn't expect that there would not be a single German shown onscreen until the closing two minutes of the film. How interesting is that for a WWII film, no over the top Nazis as baddies?

I didn't expect the music to be so integral to the experience.

I didn't expect to be so sensorially affected, so involved in the raw, animal, survival instincts of the film. I actually found it hard to fall asleep last night when I got home.


Modelling and "Dunkirk"


I did come out wanting to build a Spitfire model. It is a joy to see these majestic aircraft flying during the film, they truly are a sight to behold.

Overall, there aren't that many outstanding modelling "Oh I want to make a diorama of that" moments in "Dunkirk". When you watch "Saving Private Ryan" for example, there are several scenes which would be perfect for a diorama: the Tiger showdown on the bridge at the end, the opening D-Day landing sequence has many vignette moments. "Dunkirk" doesn't really have these, maybe because you are so close to the characters and their experience of the moment it is hard to see that bigger-picture moment. It's certainly not a criticism, it's just not what I expected.

Reading a little online about the film last night after I got home, I did encounter a couple of online comments which are indicative of the rivet-counting mindset in the modelling world which, quite frankly, does my goddamn head in.

One person pointed out: "I think you'll find that the crane visible behind Harry Styles in this scene is a 1970s container crane". Wah wah wah.

Pictured: Oh My God crane historians are horrified.

I'm sure there is someone out there who is outraged because the BEF didn't use that sort of belt buckle until 1941.

Some others are saying that the film was ruined for them because the Messerschmitts are not true BF109s, but a Hispano Buchon made to look like a Bf109.

Yeah, it's slightly wrong around the nose. Who cares?   Source.
Seriously?

The film is "ruined" because the snout of one plane looks a little wrong?

[Expletives deleted]

Get. Over. It.

Compare this to 1960s war films where they used handy Patton tanks with a little cardboard bolted on as "Tiger" tanks.

It's a visceral, epic, storytelling of a harrowing moment in history. I'm willing to cut them a little slack.

I will admit, there is a scene at the end of the film where a Spitfire, out of fuel and gliding, manages to do some pretty unrealistic things. It's a little reminiscent of the final battle in the film "Fury", where an entire battalion of elite German troops are unable to take out one immobilised Sherman tank. There are also a couple of moments of aerial warfare in the film where I thought "I don't think a bomber took ten minutes flying in a perfectly straight line to bomb a ship".  Time is a little slippery in the film, deliberately so, but this felt a little off.

But you have to be willing to suspend your disbelief. It is entertainment. If you are such a pedant that these little niggling issues "ruin" the film for you, then you are beyond help. Any of these films, "Dunkirk", "Saving Private Ryan", "Fury" - they are amazing epic motion pictures about a historical period that we modellers all find fascinating, full of the equipment we love to build. Be thankful that movie studios produce these, that it's not just all mindless action flicks and rom-coms. Take inspiration where you can, enjoy seeing WWII come to life, and step past the little inaccuracies and be thankful we don't often see stuff like this any more:

That is most definitely NOT a Tiger tank in the 2014 Russian film "White Tiger". Source.


Goddamn rivet counters.

Cheers,

Dave


Monday, July 24, 2017

Modelling inspiration: I'm off to see the movie "DUNKIRK" tonight

Tonight I'm off to the cinema to watch the new 2017 release "Dunkirk". I can't wait.


So few recent WWII films are from the British perspective. Sure, there were lots in the 1950s and 60s ("Battle of Britain", "The Dambusters", etc) and they were great, if a little hackneyed and stiff-upper-lip. But in the last few decades, there has been nothing like a British "Saving Private Ryan" or "Enemy at the Gates".

And now there is.

If that isn't a great diorama waiting to happen, I don't know what is.  Source.


I'm excited to see the film, mostly from a historical perspective. The victory-in-defeat at Dunkirk is a story well worth telling.

But the modeller in me is also planning to save up some diorama ideas.

You know it'll be good when Stukas are involved. Source.

Plus, you know, not enough movies have Spitfires in them. SPITFIRES!

I'm already sold when you show me Spitfires.  Source.


I'll report back and let you know what I think tomorrow.

Cheers,

Dave

Friday, July 21, 2017

Two Mustang milestones reached

I've passed two milestones in my current build. As I mentioned yesterday, I'm not particularly enjoying the Mustang build now, I've just hit the stage of I want to finish it up (did someone mention this is what I do as a hobby, to relax?). But having passed these two milestones, I feel a bit closer to the end of the tunnel now.


Firstly, I completed the canopy.

1/32 Hasegawa Mustang canopy
That does look pretty good, I have to admit.


Putting that in position really makes the Mustang look like a Mustang now. Without that iconic bubble top, it just didn't look right.


Secondly, I installed the propeller.

1/32 Hasegawa Mustang propeller


This prop has been such a sloooooow piece of the build. I wanted to weather the propeller blades and so I spent extra time on them (and produced a video in the process) but I originally forgot to add the decals and so I had to re-weather it all over again once I did remember and applied the decals.  Then the spinner gave me grief, the first coat didn't look right. So I had to strip it back, re-paint, re-chip. All just a pain in the bum, really.


With these two important elements built, the Mustang feels a lot closer to complete.


1/32 Hasegawa Mustang
Getting there. Getting there.


Do other modellers hit a stage of "I just want it finished"? I know that my self-imposed Only-Build-One-Model-At-A-Time rule contributes to this, but this Mustang has just fought me every step of the way. If it could go wrong, it has. I am happy with it (well, 70% happy with it, there are a number of faults I won't go into here), I don't want to scrap it, but I just want to move on.

Just a reminder to self: this is how I willingly spend my spare time!

Cheers,

Dave

Thursday, July 20, 2017

Dammit - decal dramas...

Bloody hell. I've not had this happen before. My aftermarket decals have dried with horrible ugly wrinkles in them, and I don't quite know how to fix it...


They are Eagle Editions decals - EagleCals EC-102 "P-51D Mustang To war with the Yoxford Boys". I've used Eagle decals several times before, and they have always been absolutely perfect. I would recommend them in a heartbeat.

Source.

But this time, something funky has happened. The smaller decals are fine, but the large decals (the 4 x star national insignia and the nose chequerboard pattern) have all reacted badly to the Mr Mark Softer setting solution.

When you put on setting solution, the decals wrinkle and bubble and generally look like they have been destroyed. I like to do this last thing at night and then go to bed, so I don't have to witness the carnage. When you wake up in the morning, hey presto! they are settled perfectly. Usually there is a bubble or two, but if you poke a tiny hole in the decal with a scalpel blade and re-apply more setting solution, it disappears perfectly.

But for some reason this time the wrinkles did not disappear. The large decals have dried wrinkly.


Pictured: "Oh shit".


I have tried poking holes and multiple re-applications of Mr Mark Softer. No change, even after about 6 attempts.

I have tried sanding the wrinkles out - all it does is remove the ink from the decal, not the wrinkle.

I'm a bit stumped.

All I can think to do is to apply multiple coats of gloss on top of them, to try to bring the surrounding surface up level with the wrinkles, and hope that hides it, and even then I feel that's a bit of a heavy-handed and ugly approach. The alternative is to try to remove them and apply the original kit decals, but I don't think the metallic surface is durable enough for that to work without major re-spraying of the model, and I can't face that.

Will Pattison told me that this kit would test my patience. It has, it continues to every day. I'm officially at the stage of not really enjoying building this Hasegawa Mustang any more. But this time, I can't blame the kit, it's the decals which are causing me grief.

Bugger. I'll let you know how I get on.

Cheers,

Dave


Wednesday, July 19, 2017

Video: My build of the venerable Revell 1/32 scale Ju87B Stuka dive bomber

This showcase of my build of the 1/32 scale Revell Ju87B Stuka is the first in a new series of videos, where I show you my previous builds and discuss what they were like to construct, what pitfalls to avoid, what aftermarket items I added, etc. If you like it, please let me know. Alternately, if you don't like it or it's not interesting, please also let me know and I'll stop producing them. You guys are my audience, I want to make what you want to see!


The 1/32 Revell Stuka is an old kit. I mean, really old. First released in 1969 type of old.

Original 1969 box art. Source.
Obviously, this was going to be a challenge.

When I set out to build it, I had three ideas in mind:

  1. I really wanted a Stuka in my stable of aircraft models. It's such a brutal, predatory-looking plane.
  2. I wanted to see how much I could bring an ancient kit up to modern standards.
  3. I wanted to have fun.


There are definitely some shortcomings to my completed build. I couldn't face sanding off and re-scribing all the panel lines and rivets. I don't mind raised rivets, they don't offend my delicate sensibilities like they do to some people. That said, the rivets on this baby are definitely over-scale and a bit too pronounced.

Also, the seams where the fuselage halves meet up are a bit dodgy. I tried to fill the gaps and even up, but it doesn't bear close inspection! ;)

Anyway, have a look and let me know your thoughts. Like I said, if it gets a positive reception I will produce more review/showcase videos. If it doesn't, then kaput.

Video is embedded below, but in case it doesn't work here is the link:
My build of the Revell 1/32nd scale Stuka Ju87B model kit.

Cheers,

Dave


Saturday, July 15, 2017

Cross-genre modelling and what it can teach us

We all tend to build in the same little categories. For me, it's 1/35 WWII armour, and 1/32 WWII aircraft.  I don't build 1/48 or 1/24. I don't build jets, or WWI biplanes, let alone stuff that is further afield like ships or model railroads or hotrods.  But in doing this, sometimes we can miss out on cool developments in other fields of modelling.


I was browsing Pinterest today, and found two incredibly interesting sci-fi builds. Both are Maschinen Kreiger (otherwise known as SF3D) vehicles. What is Maschinen Kreiger, I hear you ask? Good question - there are some answers here, but just search Google Images for "MaK model" and you'll see what it's about.

The first interesting one I came across is this one. It is a 1/20 scale Maschinen Kreiger Kröte, with a skull replacing the normal turret.


I'm not much of a fan of the skull, I think it's creative but it doesn't really do it for me.  But what really does impress me is the incredible texture and tonal variation of the skull. Check this out, it looks like a Soviet T-34 turret, all cast metal and weld seams

Those rivulets of molten metal down the side!

These contour lines of welded and cast metal are just the best.


Compare that to these photos of Soviet armour:

Source.

Source.

Source.

I actually don't know how they've achieved those textures, but damn it inspires me to experiment and try to replicate it myself!

_____________________________

The second inspiring sci-fi build also came from Pinterest.  It is a diorama named "Memento Mori" by a modeller named nbagi, and features another 1/20 scale Maschinen Kreiger Kröte walking machine.


What first caught my eye here was the diorama base. That puddle between the walker's feet is so atmospheric, so polluted and dingy - it just tells a story of desolation and battlefield no-man's-land.


But then I noticed the painting on the upper surface of the turret, which I hadn't really paid attention to at first. This is one of the better burnt-out wrecks I have seen modelled. That paintwork is just sublime. It looks like the modeller has used the hairspray technique, and the tones are bang on. The fresh rust, the ash colour, the grey of the now-cooled metal. Spot. On.


I guess what I'm saying here is that it's good for us to occasionally step outside of our normal build interests, to see what is happening in the rest of the world of model making. Everyone is experimenting with new methods and techniques, and what works for representing a burnt-out 3000AD mech walker can also be used for a burnt-out WWII tank or truck. I don't think I'll ever be inspired by a model of a manga anime girl or a Hello Kitty doll, but you never know.

Cheers,

Dave

Friday, July 14, 2017

What the postie delivered today - non-skid surfaces and a crane

It's always great to come home to a delivered parcel that you know contains modelling goodies.


Oooh, a parcel for me!


I've decided that my next project is going to be my anti-gravity lighthouse that I last wrote about back in November (yes, like seven months ago...) So this week I ordered some 1/35 scale non-skid plating for the deck.

I racked my brains trying to come up with a way to get that raised diamond pattern on a surface without having to pay for it. Maybe if I pressed thin aluminium onto a fine mesh it would give that texture? I wasn't sure, so I just decided to bite the bullet and pay up.


Yeah, that's pretty blurry photography there Dave...


I ordered from BNA Model World here in Australia - I've always found them a very professional outfit, fast delivery and easy ordering. Recommended.

I also ordered a crane. It's a photoetched metal job, and I love it. I do actually think that it's a little strange having a hand-operated winch on a high-tech anti-gravity ship, but screw it, I like the way it looks. I'm aiming for an interesting mix of high-tech propulsion design and low-tech grungy cheap construction, so this should fit nicely.

Source.


All this stuff is going towards this concept:


I'm really looking forward to building a fantasy concept piece. Not having to deal with rivet counters is going to be a pleasant change.
Rivet Counter: "That hand-operated crane does not look correct!"
Me: "It is an imaginary machine. Please go away".

Ahhhh, bliss ;)

Cheers,

Dave


Thursday, July 13, 2017

Small child + oil paint + unsupervised model

Today we had some family friends visit, and they have two young girls under five. Last night I was doing some black oil paint panel line washes on my Mustang, and left it on my workbench to dry overnight. You can already kind of see where this is going, can't you?


My work area is upstairs, near my daughter's bedroom. And the three girls came upstairs to play this afternoon...

There was a glob of black oil paint sitting on my workbench, and paintbrushes handily nearby...

The Method.


This was the olive drab anti-glare section on my Mustang last night:

The Victim.


And after attempting to wipe off the glob of black oil paint, this is it tonight:


The Crime Scene.


The scary thing is when I saw it, I couldn't work out how the &^%$# I had managed to smear a gob of oil paint on my model when I left the workbench last night. Some kind of mini-stroke brought on by inhaling too much thinners?

Then I saw the uncleaned paintbrushes with oil paint on them, and put two and two together. my daughter ratted her out, saying that the littlest visitor had wanted to paint too.

It could have been a helluva lot worse. If the littlest visitor had wanted to paint more, she could have. It's going to be easier to repaint olive drab than to repaint the metallic finish, or to re-decal.

And I get it. I'm not at all upset at her, if I was three and saw that on a table near me I'd probably do the same. Perhaps I just started a lifelong model maker?

That said, lesson learnt about small children playing upstairs unsupervised.

Aargh,

Dave


Wednesday, July 12, 2017

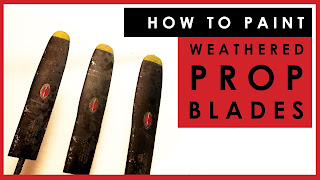
Video tutorial: How to paint and weather propeller blades

My latest video shows you how to paint and weather WW2 propeller blades. They don't have to be boring, black and flat. Check out the below reference photo and tell me you aren't inspired:


Amazing weathered propeller blade
I can't remember where I found this online, sorry. But jeez it's cool.


Tell me that isn't the most interesting prop blade you've ever seen! The oil stains, the chipping, the aluminium showing through, the tonal variations - just amazing.

I decided I wanted something like that on my current P-51D Mustang build, so I set out to replicate that look.  The result?

How to paint and weather propeller blades on scale model aircraft


There are a number of techniques involved. I glance over the salt technique fairly quickly, but if you are unfamiliar with it I have done a previous video on it.

Have a look, and please let me know if you think I got close to the weathering in my reference photo. Now I'm looking forward to attaching these blades to the (almost complete) Mustang.

Video is embedded below, but in case it doesn't work here is the link:
How to paint and weather realistic propeller blades on scale model aircraft.


Cheers,

Dave


Monday, July 10, 2017

Guest post by Ian Gittins: Trumpeter E-100 "paper panzer" tank

Today we have another Guest Post by my friend and fellow modeller Ian Gittins. You may remember his cool Dragon VK.45.02(P)H tank build a while back. Here he talks about his latest build and the various ups and downs involved.


____________________________


Trumpeter E-100 "Paper Panzer"


Trumpeter make excellent no fuss, no frills kits. Moulds are always good and crisp, they are relatively cheap and have a great variety to choose from. The E100 is part of the "paper panzer" range, and the thing I like most about them is that they can allow you to use your imagination in terms of camo schemes, add-ons or whatever you feel like coming up with.

The kit is really easy to build and takes no time at all. It fits together really well with no gaps, very little flash, and only required some minor sanding. Most Trumpeter kits usually come equipped with a colour painting guide plus photo etched parts.

The only downsides to the kit are the rather weak rear idler wheel arms, and the rubber tracks don't take glue or paint  at all well. So, the idler wheel arms had to be superglued and the tracks required a couple of staples. With rubber tracks I usually stretch them a little before painting and that gives you plenty of slack and that all-important sag! The tracks were painted with Tamiya acrylics, but it came off in places once I started putting them onto the wheels which was a bit annoying, but that can be fixed with a bit more pigment here and there. Maybe enamel paints would adhere better to the rubber?

Trumpeter 1/35 E.100 tank


I added a ball turret which is from my spares box, and the machine gun in the turret is a chopped-in-half MG42. As always, i managed to snap off each of the machine guns, but this time I went to a new level by breaking each gun off TWICE each, so from now on I'm going to put machine guns on last or invest in some metal ones.

For the painting I used the hairspray technique and Tamiya acrylics. The damage/dents were inflicted with a Dremel tool, and for the weathering I used a multitude of stuff including wood glue, soil, Wilder washes (which are really good), Vallejo washes, AK Streaking stuff, oil paints and salt technique ... just about everything really.

I really wanted to do a rather beat-up look for this kit... you know, the missing fenders, rusty red panels, etc etc, but it's been done so often by modellers I couldn't bring myself to go that far because it's nothing new or unique, so I held back a bit.

Trumpeter 1/35 E.100 tank
That battle damage is just spot on - Dave.

Trumpeter 1/35 E.100 tank
I love that red primer hatch. Nice touch - Dave


Trumpeter 1/35 E.100 tank


___________________________

Thanks Ian, that is a great build. I really, really love the battle damage and ricochet marks - that metal underneath is just perfect to my eye.

What a monster of a tank the E-100 would have been. 140 tonnes (at its heaviest the Sherman was 38 tonnes, even the Tiger I was only 54 tonnes!). A 128mm main gun, or 149mm according to the original blueprints.


Pictured: Allied tankers' worst nightmare.


More info on this monstrous paper panzer here if you're interested: Panzerkampfwagen E-100 tank.

Incidentally, if any of my readers are interested in submitting a guest blog post, please do just get in touch, I'd love to hear from you.

Cheers,

Dave


Saturday, July 8, 2017

Decals 101: how to avoid silvering, and how to get decals to settle into gaps and over rivets

When I first started making models, I would gloop the decals on with no planning, and inevitably I would be disappointed. There would be silvering around the edges, and it could sit like a tent across any raised detail like rivets or bolts, or across a gap between panels. Not good.


Pictured: Not good.
This is silvering, when the carrier film around the graphics or letters can be seen. All that silver area around the K and A is silvering. Source.

Pictured: More not good.
Look at how the decal bridges across the panel gap, and how it doesn't fit snugly under the rear overhanging part.  Source.


With a fair bit of time having passed since then, I can now apply decals with a minimum of tears flowing.


The secret to perfect decal application


There are three secrets to applying perfect decals to your scale model:


  1. Apply decals to a gloss surface. This stops silvering every time.
  2. Use a setting agent to make them settle into place.
  3. Apply another gloss coat over the decals once they are dry. This helps to get rid of any raised lip edge of the decal, and protects it from weathering processes to follow.


My preferred setting agent is Mr Mark Softer. It does the job, and it does it well. I have also heard that Solvaset is a good product as well.

Here are the decals I've started applying this week. This is after two coats of setting agent.

You can see where the setting agent blisters and cracks the decal. Don't panic, it's meant to do this.


This decal is now perfectly set over the raised detail of the filler cap, and there is no silvering.
Another gloss coat on top will help get rid of that slightly visible edge of the carrier film.


Looks bad. Is good. It's doing its thing.


I'll come back in a day or two to show you the finished results.

Cheers,

Dave