Friday, October 28, 2016

It's been a quiet week

Apologies for the radio silence from this end - we had guests from Sydney staying at our house, and I've not had much chance to work on my blog.


As a special thank you for bearing with me, here are a couple of teaser shots of an upcoming series on a 1/32 Japanese fighter plane - a Kawanishi N1K2-J "George".

I hope you like them.

It's Friday night, so a weekend of model-making beckons.

Until next time, keep experimenting!

Cheers,

Dave

1/32 Kawanishi N1K2-J "George" 
This was my first attempt at masking Japanese hinomaru markings, rather than using decals.


Friday, October 21, 2016

Building a 1/35 Japanese Kurogane 4x4 staff car diorama - Part V: adding movement

Modelling movement in a static model


When we left off in Part IV (click here), I had just finished some critical assessment of my model and had tweaked a couple of details.

Now it's time to complete the vehicle before moving on to the diorama base.

There is a lot of thought required to make a stationary, static model look in motion.

I added the helmets to the front driver and passenger, and then added camouflage vegetation to the driver's helmet so that I could make it appear to be flapping in the wind.


I also tipped back the helmet on the wounded passenger, to hint at him slumping back in his seat in pain - added drama and storytelling.


For additional movement and drama in our scene, I also modelled the loose strap on the hood. Getting photoetched metal to roll into nice smooth curves is not easy, but it adds motion...

Actually it was painful to get those curves how I wanted them.

As previously described in Part III (click here) I turned the front wheels to have them steering into a tight corner.

Lastly, I decided to model a pair of binoculars hanging and swinging from one of the side mirrors as the car rounded the corner. I grabbed a pair from the spares box, and added a strap made from a strip of foil from the top seal of a whiskey bottle.

Swinging binoculars.

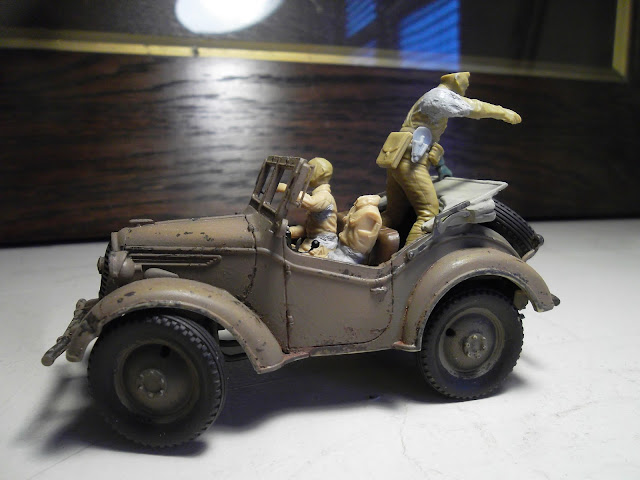
So look how much motion I was able to convey in this model with a few simple tweaks and scratchbuilds, compared to the very same model if it was built straight from the box.

Look at it go!
Stock standard image courtesy Rakuten Global Market.

Come back in Part VI when I build the jungle base to my diorama!

Cheers,

Dave

Thursday, October 20, 2016

Video Tutorial: how to add a desert sand texture to diorama groundwork - Part II Rocks and Painting

Desert dioramas. Just how do you get a realistic look to the rocks and sand?


I've uploaded the second part of my video tutorial series on adding desert terrain to a diorama base.

(In case you missed it, Part I was here - it dealt with adding the overall sand texture on top of the previously prepared plaster of Paris groundwork)

In Part II, I add rocks to break up the freakishly uniform texture in Part I, and I commence painting.  It really starts to come to life after this.

In an upcoming Part III, drybrushing will highlight the texture, and I will add shrubs and various desert vegetation to the diorama.

My Tunisian Tiger is coming along nicely!

Video link: How to add a desert sand texture to your diorama - Part II.

Until next time, keep experimenting!

Cheers,

Dave

A little trial run of seeing what the figures look like. Nothing permanent yet.

Damn, I'm happy with that diorama terrain.


Ignore the cork buried in the sand. It will be removed before the end.  Nothing to see here, move along...


Tuesday, October 18, 2016

Video Tutorial: how to add a desert sand texture to diorama groundwork Part I

I've just uploaded a video tutorial on how to add a sandy desert texture to your diorama base.


This is Part I, where I show you how to add the base sand texture to your plaster base.

Part II will show how to add rocks and start painting your desert diorama scenery.

I hope it's useful!

Video link: How to add desert sand texture to your diorama - Part I

Cheers,

Dave

Sand in the background, plaster ready to be worked on. Let's make this happen.

Monday, October 17, 2016

Tiger I in Tunisia 1942 - diorama groundwork continues

Just lookit that!


Thought I'd share my latest image :)

Cheers,

Dave

Tiger I in Tunisia, 1942. Diorama is coming along nicely.

Building a 1/35 Japanese Kurogane 4x4 staff car diorama - Part IV: figures

Ahhh, figures - the Achilles Heel of many model makers...


In Part III I had just started testing the location of the partially made figures in the staff car (click here for Part III).

I continued on with the figures. The front passenger was to have been wounded, and there was a perfect head in the Masterbox kit with a great expression for this. You can see the scale difference between the Masterbox heads and the kit's original passenger and driver bodies... But the expressive face was just too good to not use!

Look at that large head there.

I also added the shade material at the back of the officer's cap. This was made out of an old seal from a whiskey bottle - every bottle of (halfway) decent wine or whiskey comes with a metallic foil seal around the cork and the top inch or so of the bottle. When you find one that is decent, foldable metal - keep it!  (Don't bother with the crappy plastic ones).

Then I began painting. Base coat of khaki, flesh tones, the usual stuff.  I will be doing an in-depth post soon about how to paint figures, so I won't go into too much detail here.

Driver with invisible steering wheel.


I added a pistol from the spares pile to the officer's hand.

What looks wrong here?  Can you spot the problem?

The figures continued until I was happy with them. I tried to particularly pay attention to their facial expressions.


It's hard to realistically paint blood.  Avoid bright red, that just looks garish and unbelievable.


Critical Assessment of your model


Then it was time to assess the progress so far, and two things really started to bother me.
1. The officer wasn't actually firing the pistol. He had no finger on the trigger.
2. The kit's rolled-back hood looked too fake, too perfect, too solid.
So...

I used a tiny piece of stretched sprue to give the officer a trigger finger.  Technically he now has six fingers. Shhh, don't tell anyone.

Much better!


And I built a wire frame for the hood, based on the size of the plastic kit hood. A bit of guesswork went into this, but the basic shape was the same.  Then I cut a piece of white tissue to rougfhly the right shape, soaked it in a mix of 70% PVA white glue and 30% water, and draped it over the wire frame. Then I carefully placed this on the car, taking care to not drip glue over the bodywork.  I also used a spare couple of photoetch rifle straps as hood ties, as I wanted to have one flapping in the wind to give more motion to the diorama.

Building the hood frame out of easily-bent wire.


Once this dried, I painted it up and was very pleased with the result.  It's a much more realistic version of the hood than the chunky, solid original kit part, and it was easy to do.


I think you'll agree, this is a big improvement.

Check back next time, I'll be finishing the model and the figures and starting on the diorama base!

Cheers,

Dave


Saturday, October 15, 2016

Back working on the Tunisian Tiger I diorama

I've been concentrating on the SU-122 lately, but this weekend I got a chance to work some more on the groundwork of the Tunisian Tiger diorama.  


More texture has been added, more variety in the sixe of the rocks.

Here's a little teaser.  The ground still needs to be painted, but it gives you an idea.

Geez, I love a Tiger tank...

Cheers,

Dave

1/35 Tiger I in Tunisia
No, seriously, I love Tiger tanks. 

Thursday, October 13, 2016

Video tutorial: how to paint model tank tracks the EASY way

Hello hello,

Another video tutorial.  This time, I show you a fast, easy, fuss-free way to paint model tank tracks.

A lot of modellers are spooked by tank tracks. And yes, they can be a little intimidating when you pick up this glorified elastic band and think "How do I paint that?".  Getting realistic paint on your tank treads needn't be a headache. It works equally well on rubber band tracks, individual plastic link tracks, and those expensive fancy-pants metal tracks if you are Mr Moneybags.

Watch the video, the method is easy, cheap and fast. You can thank me later.

Video link: The easy way to paint realistic model tank tracks.

Until next time!

Cheers,

Dave

The easy way to paint model tank tracks.
A hint: it involves oil paint. Cheap, dollar store oil paint.

Wednesday, October 12, 2016

What next for the SU-122 tank?

So the SU-122 is coming along nicely. I'm very happy with the weathering and the paint is looking nicely distressed to me.

But now I am in a quandary: do I leave this as a forlorn, forgotten abandoned ghost rusting away in a field somewhere?

Or do I load it up with tools, baggage and crew and make it Stalin's most beaten-up machine rolling into Berlin in 1945?

Decisions, decisions...

Dave


Monday, October 10, 2016

Building a 1/35 Japanese Kurogane 4x4 staff car diorama - Part III: wheels, figures, action!

When we left off in Part II (click here) I had just finished chipping the paint using the Hairspray Technique.

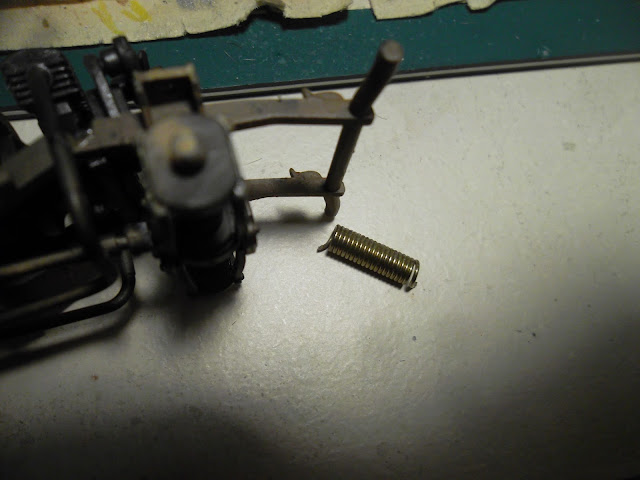
The build continued after that. Wheels went on normally at the rear, but I wanted to make the front wheels have more of a dynamic feel - I had decided that this jeep deserved a diorama base, it wasn't just going to be a static single model.  Sadly, the kit did not allow posing the front wheels, which required some surgery to the front axle and some new suspension to be scratchbuilt.

1/35 Kurogane Japanese jeep - the wheels start to go on
Back wheels? Fine. Front wheels? That axle ain't turning nowhere.

1/35 Kurogane Japanese jeep - the wheels start to go on
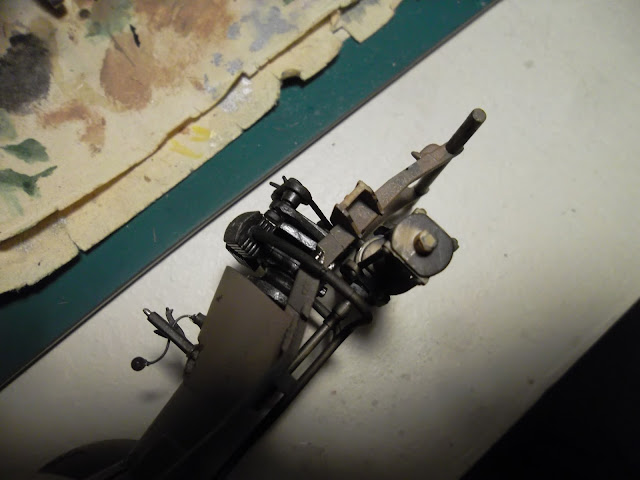
Such a pity that cute little air-cooled engine will never be visible.

1/35 Kurogane Japanese jeep - the wheels start to go on
Make your own suspension springs.

1/35 Kurogane Japanese jeep - the wheels start to go on
Some minor axle surgery, and the front wheels turn - hooray!

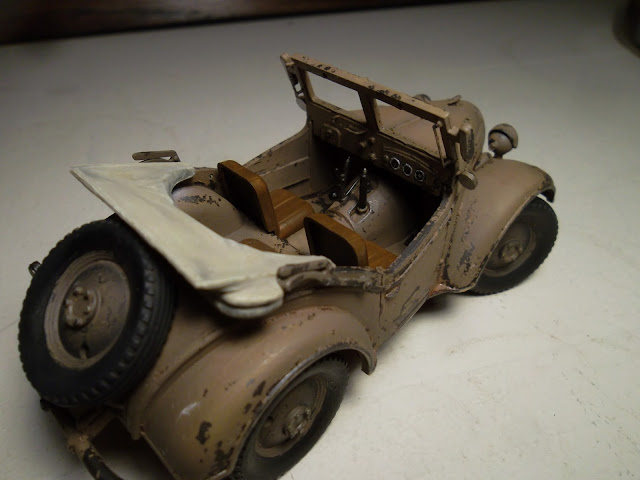
Then I finished the interior: seats, controls, etc, as well as installed the folded-back canvas hood (more on the hood later...). I tried scaling down a photo of a real Kurogane's instrument panel and printing the dials on A4 paper. Then carefully cutting them out and sticking them in. I wouldn't say it was a complete success, my printer just doesn't have that resolution, but it was an interesting exercise.

1/35 Kurogane Japanese jeep - the interior takes shape
Interior in position. I left the steering wheel out at this stage because I knew it was going to be a tight fit fitting the driver.
You can also see the gauge dials I printed on paper and stuck in - not amazing, but worth a shot.

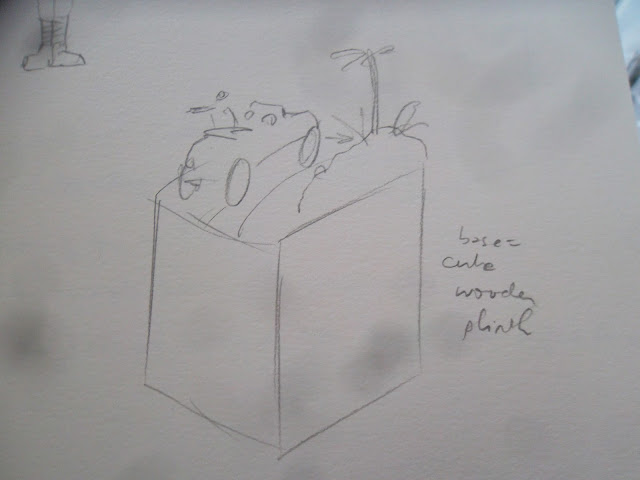
Next up: planning the diorama.  I had an idea that I wanted to make a very dramatic scene, full of movement and energy.  I wanted to tell a story of a Japanese patrol who ran into an Allied ambush, and had to beat a hasty retreat. I always sketch my diorama ideas, to really finesse it before committing to the idea. Even if you're no great artist, this step is essential - planning saves time in the long run, plus it's exciting to see your ideas coming together when your actual model may be a long way from completion.

my diorama planning sketch
First ideas of the tall plinth base.

my diorama planning sketch
A little like Leonardo's sketchbooks.

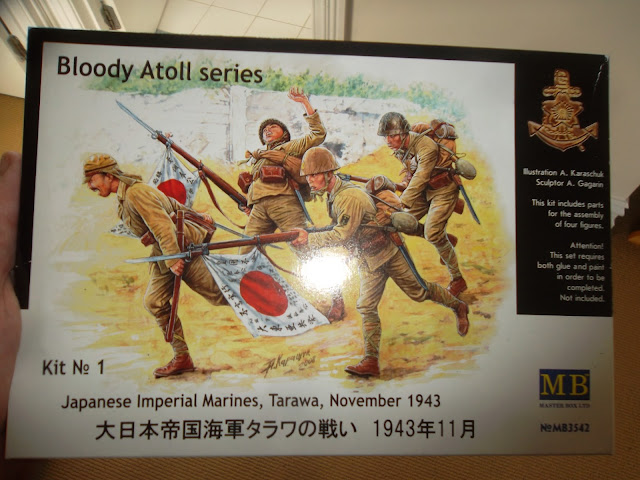
Then I started the figures. The Kurogane staff car is a weird little thing, it has three seats: two in the front and one in the back. The two figures seated in the front came with the kit, and they are crazy under-scale - maybe deliberately so to make them fit within the tiny vehicle.  I also purchased a figures kit: 1/35 Japanese Imperial Marines, Tarawa, November 1943 by Master Box (kit # 3542).  It is a great kit, I highly recommend it - really beautifully sculpted, and full of detail. I wanted to use the officer figure as my third passenger, and with some tweaking he would be firing a pistol at the pursuing Allied troops.

Master Box Japanese Marines "Bloody Atoll series"
A great kit - recommended.

Master Box Japanese Marines "Bloody Atoll series"
This is the officer I wanted to adapt.


Here is the first trial of the figures in position, a dry trial to make sure they fitted and told a coherent story. The heads supplied in the vehicle kit were woeful, no expression at all, so I replaced the two front figures' heads with ones from the excellent Masterbox kit, full of emotion and expression. I also decided here to make the front passenger wounded, to add to the drama.

Dry fitting the three figures to see that they work
You can see the putty work involved in tweaking the poses of the figures.

Dry fitting the three figures to see that they work
Look at the scale difference in the torsos between the standing Masterbox figure and the 2 x vehicle kit figures seated!

Dry fitting the three figures to see that they work
Drama! Drama! Drama!

Come back for Part IV where I concentrate on the figures, and work out how to get even more life and motion into this diorama.

Until next time!

Cheers,

Dave

Sunday, October 9, 2016

Fail: first version of SU-122 chipped paint

Proof that even so-called "experts" can stuff it up - here is my SU-122 after my first attempt at chipping and wearing away the paint.

It looks pretty crap.  Not at all realistic, and the top layer of green acrylic paint just sloughed off in great big sheets rather than chipping and gently wearing away.

Oh well, back to the drawing board.  I think my plan is now to try to remove all the green, re-apply chipping medium, and then respray green in a much thinner and spotty coat.

Sigh...

Dave

Look at those paint wrinkles.  What the..???.

Not so much weathered as paint-stripped :(

Thursday, October 6, 2016

Building a 1/35 Japanese Kurogane 4x4 staff car diorama - Part II: The Hairspray Technique

Hello hello,

This is my second post in a multi-part series on how I built my 1/35 Japanese staff car diorama.

When we left off, the Kurogane was partially built and undercoated in Tamiya Dark Iron.

My next step was to add some rust which would appear through the topcoat. For this model, I made my own rust by dissolving steel wool in vinegar over several days. Here's a link which shows you how to do that:  click here.  I have to say, I have since moved on to AK Interactive Rust acrylic paints, which are more realistic and versatile though!

Adding rust to a painted model
Textured rust pigments added to typical areas that would rust: crevices, where wheel arches meet the body, etc.

Adding rust to a painted model
That texture will eventually show through like real rust would.


The Hairspray Technique


Next came the Hairspray Technique.  I had read about this and wanted to give it a try, and it worked a treat.  All you do is spray a layer of hairspray over the basecoat.  I used plain old hairspray that cost 2 bucks at the local supermarket. It's better to do two or three thinner coats than one thick gloopy coat.  This will form a seal over your base metal colour, which later paint coats will not penetrate.

Then I airbrushed the model with Tamiya enamel khaki.  I put a little colour modulation in for shadows, as you normally would.

Hairspray Technique - top coat is painted over the base coat and hairspray
Meh, yeah, it's khaki. Yawn...

Hairspray Technique - top coat is painted over the base coat and hairspray
It's nice and all, but it's nothing special.  Yet.


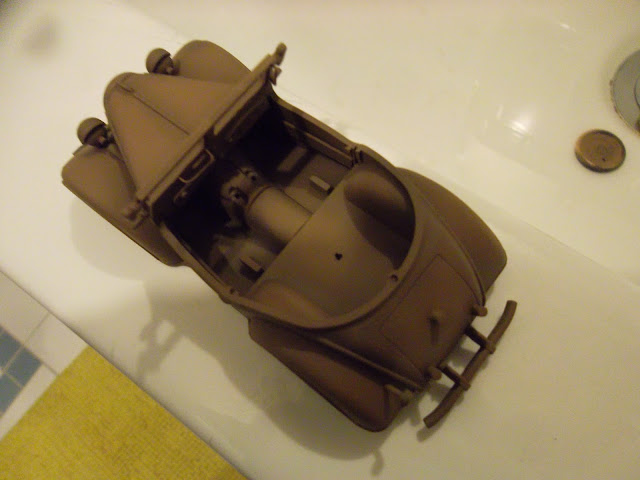
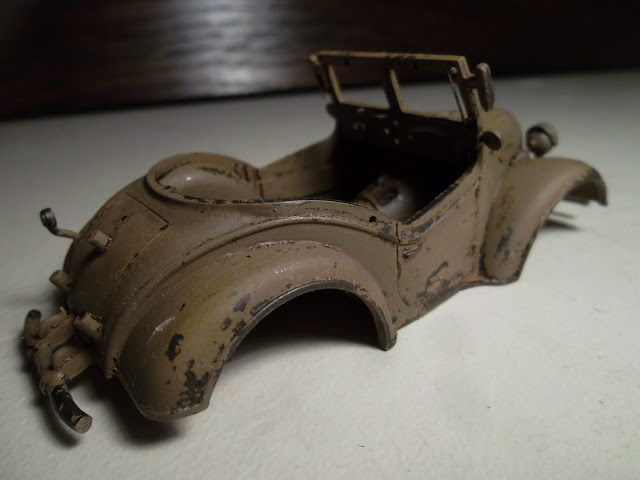
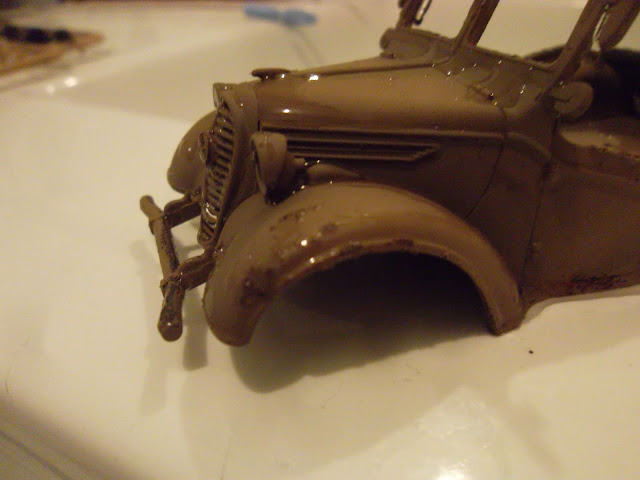
Then comes the cool bit of the Hairspray Technique.  Once the top coat is dry, you wet the model in tepid water, give it a minute or so submerged, and then chip off the top khaki colour to reveal the bare metal underneath.  Brilliant!  You can use a toothbrush, a toothpick, scalpel blade for scratches, matchstick - whatever takes your fancy.  It is fun, slightly hair raising (you don't know exactly how it's going to turn out, it is ever so slightly random) and gives an amazing result!

Work gently, dry it regularly with paper towel or a soft cotton towel, because the water will keep working its magic and you don't want large sections of paint to just slip off. Try it, you will never go back.

Hairspray Technique -wet the topcoat and chip it off!
The water doing its thing.  It's like sorcery.

Hairspray Technique -wet the topcoat and chip it off!
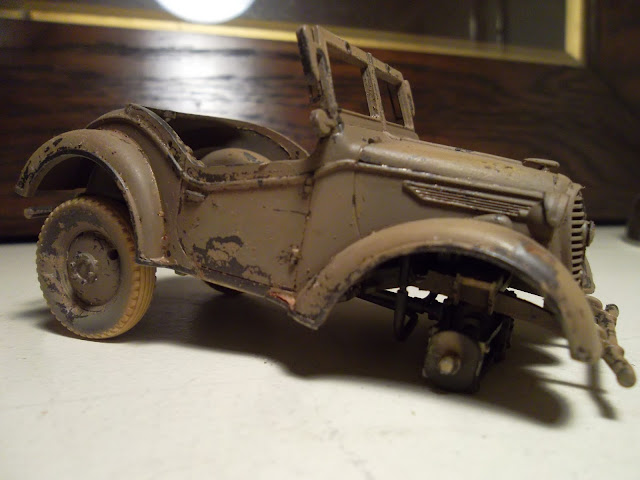
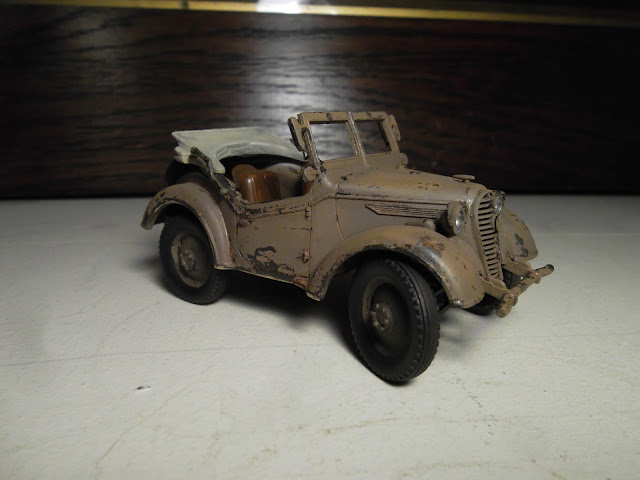
Result: one chipped, scratched and generally beaten up Kurogane staff car.

Hairspray Technique -wet the topcoat and chip it off!
That has definitely been belting around a Pacific jungle somewhere.

Hairspray Technique -wet the topcoat and chip it off!
How real does that look?  "Totally real", I hear you say.  Damn right.

Hairspray Technique -wet the topcoat and chip it off!
One internal door panel came loose with the water, easy fix.

Hairspray Technique -wet the topcoat and chip it off!
Don't forget to do the wheels as well.


I love this technique. It gives you realistic scratches, chips and worn areas, because they actually are real scratches, chips and worn areas. It looks so much better than painting on metal "scratches" on top of khaki!  I believe some guy first invented this technique in Europe about 2008 and entered a panzer in Euromilitaire and everyone went "oooooh!" in admiration - when you first hear about it, it seems like such a tricky technique, so magical, so professional, but in reality it is easy as pie.
That's it for now. Come back for Part III where the build progresses.

Cheers,

Dave