This is my second post in a multi-part series on how I built my 1/35 Japanese staff car diorama.
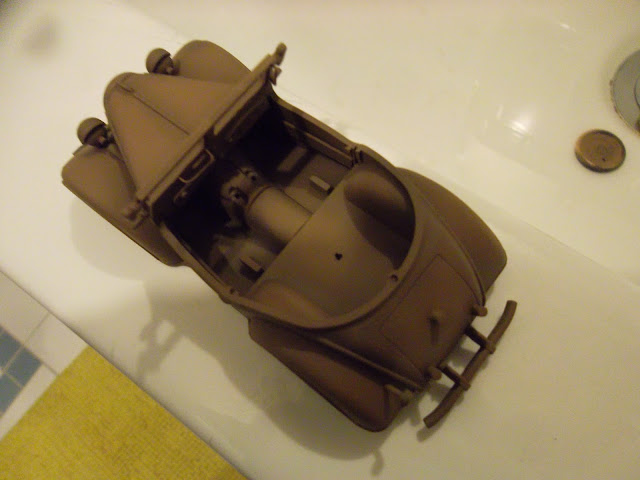
When we left off, the Kurogane was partially built and undercoated in Tamiya Dark Iron.
My next step was to add some rust which would appear through the topcoat. For this model, I made my own rust by dissolving steel wool in vinegar over several days. Here's a link which shows you how to do that: click here. I have to say, I have since moved on to AK Interactive Rust acrylic paints, which are more realistic and versatile though!
 |
| Textured rust pigments added to typical areas that would rust: crevices, where wheel arches meet the body, etc. |
 |
| That texture will eventually show through like real rust would. |
The Hairspray Technique
Next came the Hairspray Technique. I had read about this and wanted to give it a try, and it worked a treat. All you do is spray a layer of hairspray over the basecoat. I used plain old hairspray that cost 2 bucks at the local supermarket. It's better to do two or three thinner coats than one thick gloopy coat. This will form a seal over your base metal colour, which later paint coats will not penetrate.
Then I airbrushed the model with Tamiya enamel khaki. I put a little colour modulation in for shadows, as you normally would.
 |
| Meh, yeah, it's khaki. Yawn... |
 |
| It's nice and all, but it's nothing special. Yet. |
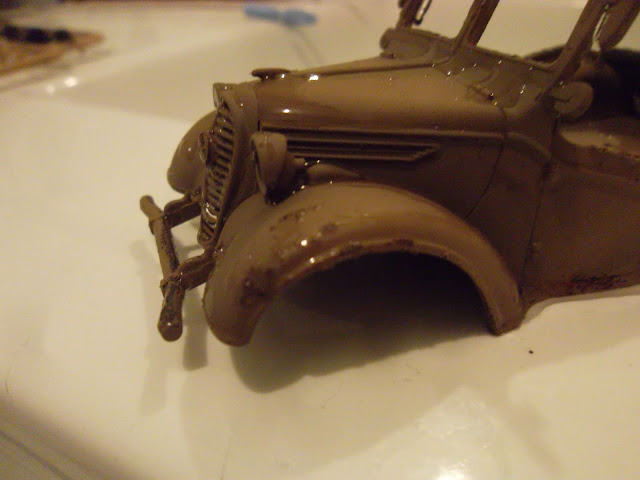
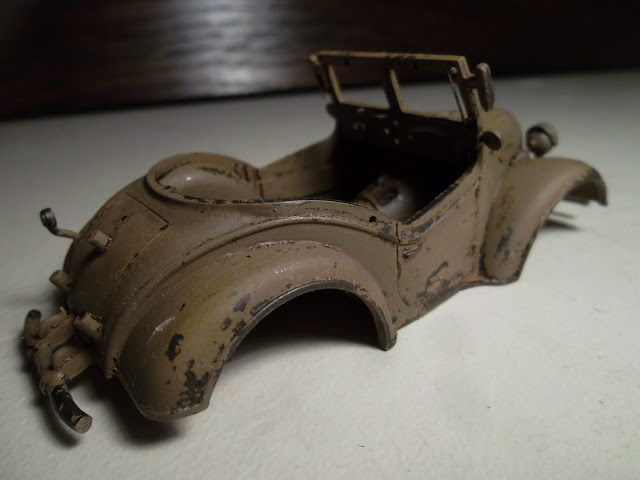
Then comes the cool bit of the Hairspray Technique. Once the top coat is dry, you wet the model in tepid water, give it a minute or so submerged, and then chip off the top khaki colour to reveal the bare metal underneath. Brilliant! You can use a toothbrush, a toothpick, scalpel blade for scratches, matchstick - whatever takes your fancy. It is fun, slightly hair raising (you don't know exactly how it's going to turn out, it is ever so slightly random) and gives an amazing result!
Work gently, dry it regularly with paper towel or a soft cotton towel, because the water will keep working its magic and you don't want large sections of paint to just slip off. Try it, you will never go back.
 |
| The water doing its thing. It's like sorcery. |
 |
| Result: one chipped, scratched and generally beaten up Kurogane staff car. |
 |
| That has definitely been belting around a Pacific jungle somewhere. |
 |
| How real does that look? "Totally real", I hear you say. Damn right. |
 |
| One internal door panel came loose with the water, easy fix. |
 |
| Don't forget to do the wheels as well. |
I love this technique. It gives you realistic scratches, chips and worn areas, because they actually are real scratches, chips and worn areas. It looks so much better than painting on metal "scratches" on top of khaki! I believe some guy first invented this technique in Europe about 2008 and entered a panzer in Euromilitaire and everyone went "oooooh!" in admiration - when you first hear about it, it seems like such a tricky technique, so magical, so professional, but in reality it is easy as pie.
That's it for now. Come back for Part III where the build progresses.
Cheers,
Dave

No comments:
Post a Comment