Wednesday, August 30, 2017

New video: How to model sea and ocean waves in a scale model diorama

I've released a new video, and it is a whopper at over 30 minutes in length. It shows how to replicate realistic ocean waves, from initial sculpting, to painting, to final detailing of the spray and whitecaps - perfect for ocean bases for waterline model ships! It's a simple enough technique, but there is a fair chunk of artistry involved in making it look convincing.


How to model ocean waves, wavy rough sea


The technique

Like I said, the actual method is pretty straightforward.


  1. Take a material you want to sculpt your waves into: plaster, dense foam, whatever.
  2. Using a Dremel tool, grind eye-shaped waves into the surface.
  3. Paint multiple coats of artist's gesso over the top to fill in imperfections and seal the surface ready for painting.
  4. Paint it overall "denim blue" - a mix of 70% Pthalo Blue, 15% white and 15% black paint.
  5. Paint highlights and shadows.
  6. Airbrush in sea green areas to modulate the colour overall.
  7. Varnish the surface with 2 coats of high-gloss varnish, and let it dry.
  8. Whitecaps/foam: Gently prise apart a cotton ball, stick this to a small section of fresh varnish. Tmp it down with more varnish on a stiff paintbrush.


See? Easy peasy. Nothing complex, all materials are pretty cheap and easily available, the most exotic is artist's gesso and that is available from any art supply store.

How to model ocean waves, wavy rough sea
The finished ocean diorama base.


The art

Aha, but the magic is in making it look realistic. That is the part of the process that is both tricky and incredibly fun at the same time. I won't lie: there is some skill and a little luck involved there. All I can suggest is have reference photos on hand, so that you replicate nature as closely as possible. Engage your creative side!

The trickiest bits are getting the colour modulation looking right, so that your sea isn't just one overall shade of blue, and moulding your foamy whitecaps with cotton wool. You'll soon get a technique that feels right, I promise.

Try it. So much of modelling is slavishly researching and replicating machines designed by humans. Dioramas with a natural setting flip this, you have to capture the randomness of nature in grass, trees, rocks, etc. Dioramas with water are a step further - embrace the chaos, it's fun.


How to model ocean waves, wavy rough sea
Pictured: fun chaos.


Video is embedded below, but in case that doesn't work for you, here is the link:
How to model Sea and Ocean Waves on a scale model diorama base.

Cheers,

Dave


Sunday, August 27, 2017

Working on the ocean base of my Sci-Fi project

Modelling water. Only brave and foolhardy modellers model water, and of them only the truly masochistic of modellers try to model moving waves and sea. I'm a sucker...


... but I'm going to have a crack at it.

My plan is to have my anti-gravity lighthouse (still need a catchier name than that...) floating above the ocean waves. That's the story. The physical reality of the diorama is that I have a round marble base that I bought from Kmart, which I have filled with plaster to simulate a wavy sea. In that plaster I have based two wires, which I am hoping to disguise as guy-ropes which are dangling over the edge of the deck, just touching the water.

Here's the cunning plan:

Aha. That is indeed a Cunning Plan.

Side-on view.


And here is the current reality. The waves look pretty plaster-y at this stage, but that will change.

Modelling ocean waves with plaster.


It feels great to be doing something so different to my last couple of builds.

Cheers,

Dave

Saturday, August 26, 2017

New video: The Ten Commandments of Building Scale Models

After my post last week on the Ten Commandments of Building Scale Models got a lot of attention and feedback on social media, I thought I might follow it up with a video, because I know a lot of my audience aren't really into the whole Facebook / Pinterest / sharing their life with the entire world thing ;)  Plus I wanted a chance to elaborate a little more on my ideas, and explain the thinking behind some of them.


As a result, I humbly present to you my video all about the Ten Commandments.

(I feel like Cecil B. DeMille...)

I go into a bit more depth about the ten ideas, and explain why and how I came to these conclusions. Plus I elaborate on my blacklist of model manufacturers - I'm not really in the habit of criticising manufacturers, but there are a couple I have just sworn off.

As a final drawcard, there are photos of the bloody results when I slipped with my scalpel. If that doesn't make you want to watch it, I don't know what will.

Video is embedded below, but in case that doesn't work here is the link:
The Ten Commandments of Building Scale Models

Cheers,

Dave


Friday, August 25, 2017

Almost 3000 YouTube subscribers

Wow. I just checked on YouTube, and I'm almost at 3,000 subscribers. Insane!


I just wanted to say a sincere thank you to each and every person who has subscribed. When I started this whole Dave's Model Workshop thing in September 2016, I had no idea how much it would take off.

Every single time someone comments on a video or a blog post, every single time someone tells me that I've helped them or given them a little shove of inspiration, it really does make me sit back and say to myself, "That's extraordinary". Every time.

Thanks people.

You're the best.

Dave

Monday, August 21, 2017

The new project is begun: a scratchbuilt Sci-Fi anti-gravity lighthouse

So I've been planning and talking about this for some time. Ummm, nine months to be exact. Ridiculous. Now I've finally commenced work on my Anti-Gravity Lighthouse. And I most definitely need to come up with a better name for this project than that.


I've been working on the base, but my first step was commencing painting the civilian lighthouse keeper. It's a resin figure I bought last year, a 1/35 "Civil Man" from Evolution Miniatures.

Source.


I've been painting his trousers navy to give him a suitably nautical feel. Next up will be an off-white jumper (or "sweater" for any Yankee readers). It's been way too long since I painted any figures, about a year, and I'm looking forward to tackling those flesh tones again.

Need to fix those sloppy joins between his torso and arms...


Obviously we will require a matte coat when he's done.


It's good to have finally started something I've been wanting to do for absolutely bloody ages. Now to make the ideas in my head turn into reality.

Cheers,

Dave


Friday, August 18, 2017

The Ten Commandments of Scale Model Building

I've been thinking a lot about my most recent build, and how now that it is finished there are one or two things that are still bothering me that I didn't correct during the build - for example, I told myself the fit of the fuselage halves was too cruddy to keep filling the seams. Now that it's completed, I can't see past those seam lines to appreciate the overall finished product. Dammit. This little piece of short-sightedness got me thinking about modelling advice, and the most important things to remember when building.


I've also been thinking about how at some stages I just wanted that Mustang finished, and off my workbench. That's a powerful motivator, but it doesn't usually lead to the best results and a sense of satisfaction in the end.

And how working with an outdated kit always involves accepting compromises.

As a result of all this philosophising and deep thought, I humbly present to you here my:


Ten Commandments for Scale Modelling


Read 'em and learn from my mistakes.


The Ten Commandments of Scale Modelling


In case you can't read it on that above image, the Ten Commandments of Scale Modelling are as follows:

I. Enjoy model building. Remember, you chose to do this for fun.

II. Build for your own satisfaction, not others'.

III. Be open to constructive criticism, it's the best route to self-improvement.

IV. Thou shalt try scratchbuilding.

V. Thou shalt save money. That fancy new technique / applicator / gizmo? Nine times out of ten you can do it yourself using basic tools and materials you already own.

VI. Conversely, ten times out of ten if you buy a cheap kit there will be problems. Either spend more or embrace it and accept the compromises.

VII. Honour thy Tamiya, for their kits are idiotproof.

VIII. Thou shalt clean thy airbrush thoroughly.

IX. You will cut yourself with a scalpel many, many times. Accept that blood is part of the process.

X. If a flaw bothers you, then fix it. Don't leave it, because it will continue to bother you six months after you "finish" thy model.

_____________________________________________


I'm like Mr Miyagi, Yoda and Nietzsche all rolled into one bite-size package. If you follow these guidelines, your modelling will improve, I 100% guarantee it. Honest.

However, this is also to provoke discussion and get other modellers thinking. Comment below if you think I've missed anything more important, or if you don't agree with any of the ten. But you better be ready with some pretty damn convincing arguments if you're going to badmouth the engineering of Tamiya kits...

Cheers,

Dave

Thursday, August 17, 2017

Photo showcase: 1/32 Mustang

I promise I'll stop posting about the Mustang soon, but I wanted to add some still photos to showcase my completed build in addition to yesterday's video.


Cheers,

Dave

Hasegawa 1/32 scale P-51D Mustang scale model

Hasegawa 1/32 scale P-51D Mustang scale model

Hasegawa 1/32 scale P-51D Mustang scale model

Hasegawa 1/32 scale P-51D Mustang scale model

Hasegawa 1/32 scale P-51D Mustang scale model

Hasegawa 1/32 scale P-51D Mustang scale model

Wednesday, August 16, 2017

New video: The Hasegawa 1/32 P-51D Mustang scale model is completed!

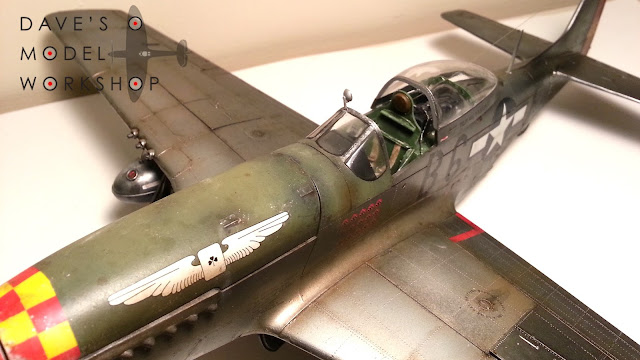
Amazingly, I have finally completed the Hasegawa Mustang! It's been my only modelling project since I started it on 2nd April, so has taken four and a half months. I'd love to say it has been a pleasure, but in truth it has been a bit of a bastard of a kit every step of the way. 


The finished result.


As you'll hear me explain in my video, I like to take old kits and bring them up to modern standards. Well, this is a 1960s kit, so it doesn't get much more old-school than this. But what I have found eye opening and frustrating in equal measure is the fact that after spending hours and hours adding scratchbuilt detail to those rather sparse 1960s elements like the wheel wells, or the engine bay, or the cockpit, it kills me that a modern Tamiya 1/32 Mustang kit has all that stuff straight out of the box, and if I'm being honest, it does look better.

Interestingly, if you view my blog post from when I started this back in April I wrote on this exact subject:
"This all boils down to this: I am going to have my work cut out for me bringing this ancient kit up to modern standards. Luckily, this is an aspect of the hobby I really enjoy. Bloody hell, I wouldn't put myself through all the scratch building and updating if I didn't, I would just buy the latest and most expensive 1/32 Tamiya Mustang kit. But I like the improving, the thought that goes into improving an old kit. Masochistic. I know."


Yeah, I'm reassessing that masochism... ;)


I'm glad to have conquered it, but it's definitely time to move on to a new, very different project.

Source.


So here's my video. She's never going to win a trophy, there are some pretty fundamental flaws, but I'm very happy to have a Mustang in my stable of 1/32 fighters now.

Video is embedded below, but in case it doesn't work here is the link:
Completed 1/32 scale P-51D Mustang model (Hasegawa)

Cheers,

Dave


Friday, August 11, 2017

YouTube news - a collaboration video coming up soon

I can't give much away at the moment, but very soon I will be releasing a collaborative video with a well-known YouTube modeller.  We'll be comparing ideas and techniques - it should be very interesting.


Stay tuned, as soon as it is released into the wild you will hear it here first.

Source.


Cheers,

Dave

Thursday, August 10, 2017

The importance of reference photos

I thought I would share with you some of the references I have gathered for my Mustang's weathering. References are important (if you believe certain competition judging rules then they are 25%-of-the-result important... ahem) as they give you a basis to work from. In my view you don't need to slavishly copy them, but they show you an "average" pattern of how stains and grime and dirt tended to accumulate on the particular vehicle you are modelling. This is your starting point for your own artistry, the basis for your own version of simulating wear and tear.


Weathering is, to me, the most fun part of a build. It's where your otherwise factory-fresh machine develops a personality, an individuality. It's where it goes from being a toy to being a miniature representation of something that has been out in the big bad world.

I really don't get totally replicating a single photo. Where is the fun in that? I know some modellers find that satisfying, but I like a little magic in my weathering, I like being a little bit nervous that I don't know exactly where it's going to end up. That randomness is liberating, man. Water, salt, paint, random chipping - this is the interplay that mimics the real interplay of real weather on the real machines.

So here are my Mustang references, which I am using to make fairly accurate representations of fluid leaks, exhaust stains, faded paint, etc. I've not kept records of the exact websites I found each of these on, but if anyone claims ownership please just let me know and I can credit you.


Scale model P-51 Mustang weathering reference
Great exhaust staining reference.

Scale model P-51 Mustang weathering reference
This is oil rather than exhaust staining, but it's a great shot.

Scale model P-51 Mustang weathering reference
I used this reference when I was working on the wing gun bays.

Scale model P-51 Mustang weathering reference
Pretty subtle exhaust here, but great for worn paint on the wing roots.

Scale model P-51 Mustang weathering reference
I like the mottled metal finish here.

Scale model P-51 Mustang weathering reference
Again, mottled metal effects.

Scale model P-51 Mustang weathering reference
A wonderful exhaust weathering reference.

Scale model P-51 Mustang weathering reference
Another good exhaust pic.

Scale model P-51 Mustang weathering reference
I considered muddy wheels for a while based on this shot.

Scale model P-51 Mustang weathering reference
Random splatters and stains.

Scale model P-51 Mustang weathering reference
Sun-baked and dirty. Just how I like my Mustangs.

Scale model P-51 Mustang weathering reference
Mottled olive drab paint on the anti-glare section.


I remember modelling before the internet, and scouring through reference books for that perfect rare photo that clearly showed a piece of landing gear, or a hatch, or whatever. It was part of the fun, but by god the interwebz makes this a whole lot easier!

Cheers,

Dave

Wednesday, August 9, 2017

New video: Weathering exhaust stains on my P-51 Mustang scale model

I've made a short video about my current progress on the Mustang, and the existential crisis I seem to be having with the exhaust stains: should I go darker? Should I leave well enough alone? If I do it at the very end and I stuff it up, will I cry like a little crybaby? (The answer is; yes, yes I will).


Actually, it's not quite such a drama in my head, but check out the video anyways. You know you want to.

Video is embedded below, but in case it doesn't work here is the link:
Weathering exhaust stains on my P-51 Mustang scale model

Cheers,

Dave


Tuesday, August 8, 2017

The latest amazing Panzer from Ian Gittins

Regular readers will already be familiar with Ian Gittins' previous work: his Dragon VK.45.02 (P)H tank and his Trumpeter E-100. He specialises in bringing to life late-war Panzers, and his latest build is just as war-weary, menacing and realistic as before.  I present to you Ian's late-war Panther.


Rust, glorious rust!


As Ian says:

"Here's the latest one off the production line at the Gittins Panzer factory... went for the rust red / missing panels / dents / rust look. Quite pleased with my rough cast textured gun mantlet.

Also added some track hangers on to the turret and used real cable for the towing cables.

Really pleased with  how this one turned out. Didn't even snap anything off either, that's a first!"


I love that mantlet texture.


I asked Ian how he achieved the rust textures and that amazing cast texture on the mantlet:

"The rust is done with a base coat of Vallejo dark rust paint followed by Vallejo pigments, a touch of Vallejo rust wash, AK Rust Effects and a hint of Vallejo Matte Medium to hold it all on.

The rough cast texture was just Tamiya glue mixed with Humbrol filler. It dries in about 2 seconds so I had to be very, very quick."


As always Ian, this is impressive stuff. I really am a fan of that rust and that mantlet texture, they truly stand out to me.

He also shared with me a photo of the Panzer Division he is building up in his laundry (with a couple of high-tech Star Wars extras):


I'm well impressed by Ian's output. He produces a top-quality model about once a month - and here I am working on the same Mustang I started four months ago! I know he has a family and a full-time job, and still he is prolific - I think I could learn from that :) Now I just need to pull my finger out and make a start on my own 1/35 Panther!

Thanks as always Ian for letting me share your amazing work.

Cheers,

Dave

Sunday, August 6, 2017

Mustang exhaust stains

I got in some airbrushing time this afternoon, and amongst other things I had a crack at the exhaust stains on the Mustang.  In the daylight I was happy with them, but under artificial light this evening I think the exhaust stains are too brownish - I think I need to add more black and make them more pronounced as would be expected on such a weathered, war-weary plane.


Here's my reference. I've gone a bit more than this, because I want my plane to look more beaten up and to have seen more service.

Yes, I know this is a later version of the Mustang than mine. Source.


What do you think? Add black, or leave it alone?

Dave

Thursday, August 3, 2017

Whisky and weathering

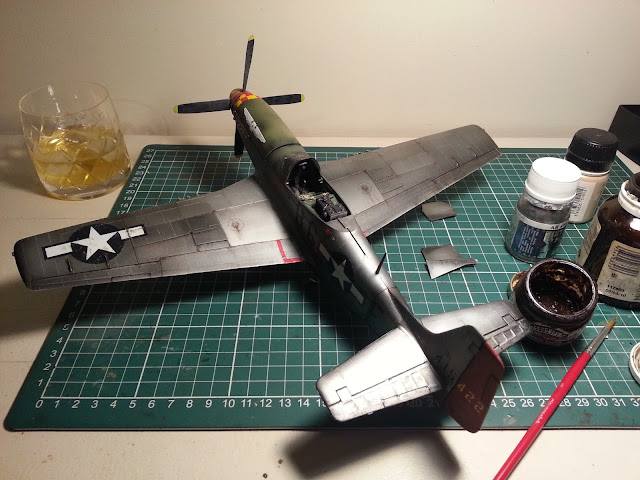
It's a cold night. Outside it's raining, steadily, so that I can listen to it pattering down on the neighbour's tin roof. Inside, I have a glass of whisky, and oil paints, and a model.


weathering my 1/32 Hasegawa P-51D Mustang


I'm in heaven.

Dave

Wednesday, August 2, 2017

Video tutorial: How to fix wrinkled or bubbled decals on scale models

My latest video grew out of my recent crappy experience with decals on my 1/32 Mustang (does it feel like this build has been going on forever?). The setting solution seemed to react badly with the Eagle Decals, and it dried leaving ugly big wrinkles. I had to do something with them, and this video shows the result.


Pictured: a crappy, crappy problem to try to overcome.


I'm not 100% satisfied with where I've ended up. The nose chequers look a million times better - a combination of weathering, chipping, and building up layers of varnish have solved the problem there.

But the "stars and bars" national insignia is another matter entirely. I tried the same solution there, weathering, chipping and layers of varnish, but it's just not s satisfactory. Rivet and panel line detail has been lost, and it feels a little heavy-handed. It's still a big improvement, but it's not as good a result as the nose chequers.

Anyway, have a look at the video and make your own mind up. I'm very open to feedback on this method, let me know how you would have solved this problem differently.

Video is embedded below, but in case it doesn't work here is the link:
How to fix wrinkled or bubbled decals on scale models.

Cheers,

Dave