Monday, May 28, 2018

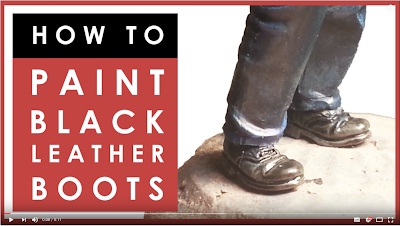
New video: How to easily paint black leather boots on scale model figures

It's been a bit of a frantic week, between a freelance graphic design gig and trying to desperately make the deadline for the Australian Model Expo which is on in just under two weeks. But I managed to find time to produce a video showing my trick for painting worn black leather boots, shoes and belts. It's a simple and bombproof tip - it gives a great, realistic result every time.


The beauty of this technique is that if you're lazy it gives a solidly realistic result straight off the bat. But if you want to detail it further, to give a better impression of worn, scuffed, dirty boots, then this technique lays the groundwork for all of that.

How to easily paint black leather boots on scale model figures


Give it a try - it works. There is a great line in the film Anchorman where one of the characters says, "60% of the time it works every time". Well with this technique, 100% of the time it works every time.

Video is embedded below, but in case that doesn't work here is the link:
How to easily paint black leather boots on scale model figures.

Cheers,

Dave


Tuesday, May 22, 2018

So I superglued my fingers together again

Less than a week after uploading a video showing how to remove superglue from your fingers: I have managed to gloop CA glue all over my fingertips again.


Even after thirty years of modelling...


Sigh.

Cheers,

Dave

Monday, May 21, 2018

Precarious: Gluing the non-slip deck in place

This looks precarious. And it is. This whole setup is to keep an evenly dispersed weight on the two halves of photoetched brass non-slip decking, so that they glue flat and level to the circular styrene disk beneath them. I'm a little worried, if this loses balance somehow that heavy coffee mug will destroy the whole bloody thing!


The brass non-slip deck in position.


(The blue ceramic pot underneath is just there to take the weight of it all - this was not my brilliant solution of how to mount the whole thing, in case you were wondering!)

I bought this PE non-slip surface back in October 2017, about seven months ago. It's good to finally make use of it.

Deep breaths. Back away from the workbench slowly, and remove the cat from the room...

Cheers,

Dave

Friday, May 18, 2018

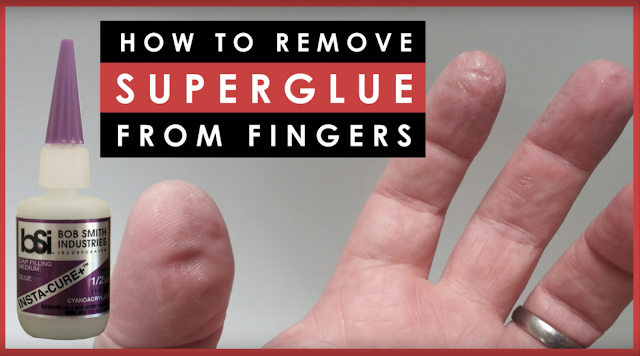
New video: Scale model basics - How to remove superglue from your fingers

I've been busy this week working on re-mounting The Seahorse after last week's disaster, so it's only a quick video this Friday. It's a basic problem, scale modelling 101 type stuff: how do you remove superglue from your fingers?


How to remove superglue from the skin of your fingers


I regularly manage to gloop CA glue over my fingertips, and I hate the funky, tight skin sensation that accompanies that for the next few days.

With this simple trick, it's easy to remove the superglue from your skin and get on with building.

Removing unintended globs of stray superglue from your carefully built plastic model? Now that's another story altogether...

Video is embedded below, but in case that doesn't work here is the link:
Scale model basics: How to remove superglue from your fingers.

Cheers,

Dave


Monday, May 14, 2018

I think I've got my Model Making Mojo back after last week's setbacks

I was feeling pretty disheartened on Friday when I released my video about the setbacks on The Seahorse. I was pretty over it, the whole thing seemed like it wasn't going to work. Meh.


But after a weekend of studiously avoiding it, and then feeling fresh this week and reading over people's comments and suggestions on YouTube, I'm feeling ready to tackle that bastard again. It's not going to beat me. I just needed some time not looking at the disappointment to get a fresh perspective.

I got a lot of great ideas and suggestions from you all, and I've now got a lot of possible solutions to work my way through.

Thanks to you all. I love having such a great community to work with, I feel lucky to have such a cool brains trust to call on when I need to. You guys rock :)


Source.

Cheers,

Dave

P.S. I'm not sure I'll make it in time for the Australian Model Expo on 8 June, but I've been working on this for so many months that I'm not about to rush it at the last minute for the sake of an arbitrary deadline. If I make it in time, great. If not, I'll have no entries in the competition this year.*

_______________________________________________________________________


* But at least I'll be 100% impartial in my commentary then, yeah? ;)


Friday, May 11, 2018

New video: Part 8 of the scratch built sci-fi series on The Seahorse

A couple of nights ago I shared with you my disappointment with trying to attach The Seahorse to the diorama base. Well, I've produced a new update video, and this hurdle features rather prominently.


Putting the whole thing together has been probably the most painful part of the whole build, as I've shared with you on my blog over the last week or two. This video encapsulates that frustration in sound and motion.

It's not my finest hour.

It's getting there, I can see the end in sight, but I think I'm ready to go back to building a manufactured kit where I have a fair expectation that it will probably all go together as intended ;)

Video is embedded below, but in case that doesn't work here is the link:
Scratch building 1/35 scale sci-fi model ship - Part 8

Cheers,

Dave


Thursday, May 10, 2018

The best new releases at the 2018 Shizuoka Hobby Show

The 2018 Shizuoka Hobby Show started today. I'm gutted that I'm not there - I visited Shizuoka in December, I walked through the exhibition spaces where the show is held annually, and I can imagine how amazing it is there right now! Plus Tamiya Headquarters is holding an open hose session over the weekend, where members of staff from every department are on hand to answer questions - aaargh, I am having Japan hobby withdrawals!!!


Source.


Oh man, what I wouldn't give to be there this weekend...
Source.


(Just to highlight this from the start: in case the longing in my opening paragraph didn't make it clear, I'm not currently in Japan - none of these images are my own. All image sources are attributed with links in the captions.)


My highlights of the 2018 Shizuoka Hobby Show


Here are the most exciting new releases I have collated from the web coverage available so far.


ARMOR


Tamiya 1/25 RC German Panther

A 1/25 scale radio control Panther Ausf.A, which seems to come with most of its RC components in the kit? Sounds like fun in a box.

Source.


Fine Molds 1/35 type 97 Chi-Ha

It's just a cool looking Japanese tank.

Source.

Source.


Meng World War Toons Sherman-Firefly

I really like Meng's cartoonish WW2 tanks. I've not built one, but I like that they exist. New releases to the range just keep on coming.

Source.


MILITARY


Gecko Models 1/35 W.W.II British MG team in combat (N.W. Europe)

A welcome addition to British military figures in 1/35 scale. For so long we had a glut of Germans and Yankees, with a tiny sprinkling of Soviets and Japanese. British soldiers were few and far between. I love that this has been rectified in recent years.

Source.


SCIENCE FICTION


New Maschinen Kreiger

I can't quite tell what is new and what is just a tweak of old stuff, but damn it all looks good!

Source.


AIRCRAFT


Hong Kong Hobbies 1/32 Lancaster bomber

Wow. Just wow. This is BIG. A 1/32 Lanc? Insane.
This has been in the works for a while now, I've been hearing rumours about it, but it seemed like one of those "too good to be true" myths. Now it seems to be nearing fruition, scheduled for a release later in 2018...

Look at the size of that monstrosity.
Source.

Source.

Source.

Seriously, look at how big that is!
Source.


Doyusha 1/32 Kawanishi K5Y2 Willow

This is a re-release of a kit that is originally a 1970s vintage, but something about it really appeals to me. I think the re-release simply consists of new box art and new decals, but I'm tempted...

Source.

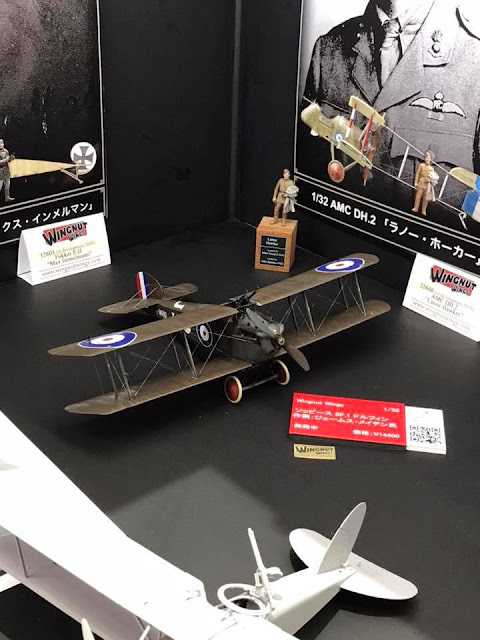
Wingnut Wings - new 2018 releases

1/32 scale WWI and 1920s aircraft? Just look at the detail in these new releases:

  • Halberstadt Cl.II
  • A new Junkers D1
  • I don't know what the British plane is, but I like it...


Source.

Source.

Source.


I'll try to come up with more updates if I see more cool stuff over the weekend.

Now, how much for airfares to Japan for May 2019???

Dave


Wednesday, May 9, 2018

Insert your favourite swear word here

Bugger. Last night I tried to install the hull of The Seahorse on the diorama base. It didn't go well.


The hull weighs about 150g, with all the superstructure installed I'm guessing it will probably be about 250g. Even if I took out the brass stove ring from the bottom of the engine, it wouldn't stand up.

The two wires that I thought would support it are just not up to the job.

This is what I wanted:

Notice the hand holding it up...


And this is how it ends up when I stop holding the hull up:


It seems I have three options:

1. Replace the wire with thicker gauge wire (but it will be a nightmare to attach it to the base now)

2. Try to splice a second strand of the same wire to the current wire, making it like a tow cable.

3. Magnets! Can I somehow install a small magnet in the bottom of the hull, and a big magnet under the base, and have them pushing against each other enough to take the weight of the model while the current wires hold it in position?

Magnets... always with the magnets
Source.


I'm not sure what the best option is now. Trying to come up with a workable solution today...

Dave

Monday, May 7, 2018

Start your engines


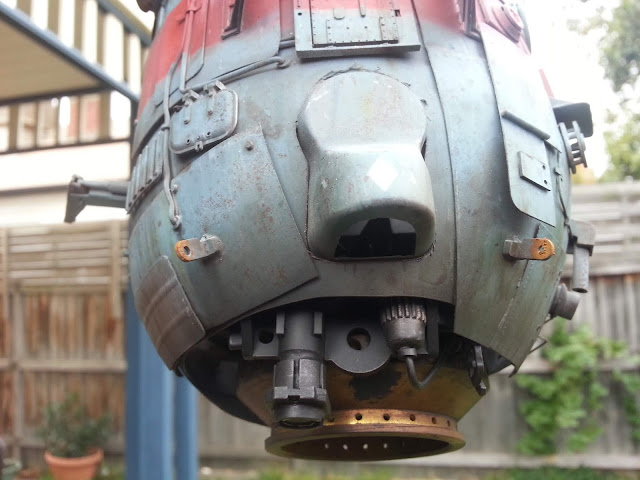
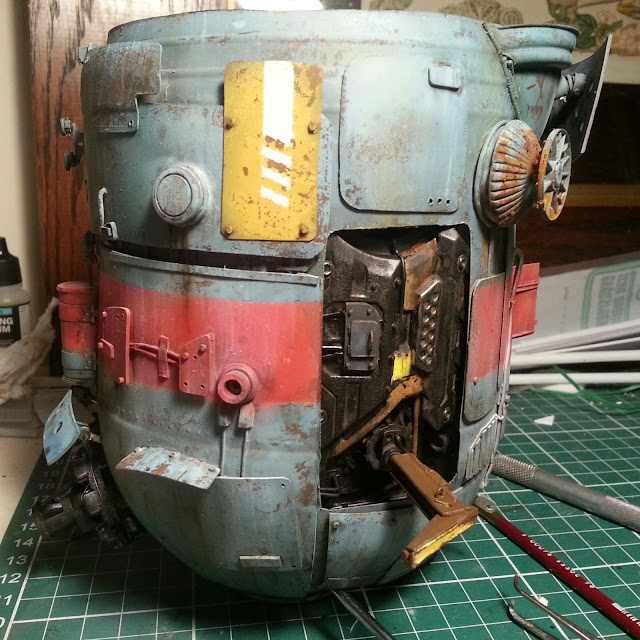
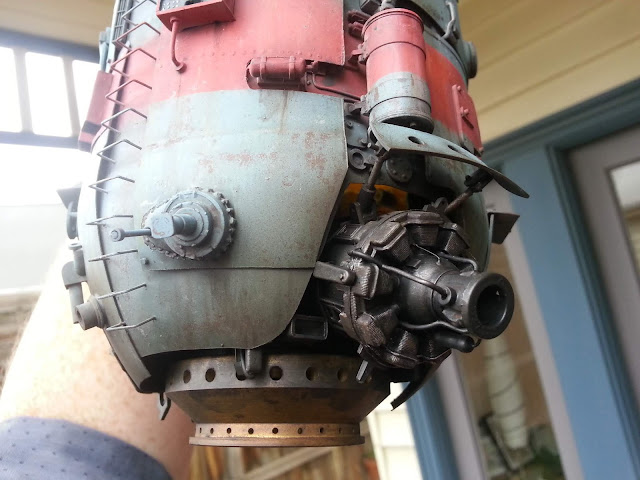
I mentioned last week that I had installed the bottom engine on The Seahorse, but I didn't have any photos that showed it well. On the weekend I had a crack at airbrushing some dirty exhaust stains around the bottom of the hull, and I made sure to take some photos of the bottom business end of things this time.


Installing the engine on my 1/35 scale model scratch build science fiction anti-gravity build The Seahorse.

Installing the engine on my 1/35 scale model scratch build science fiction anti-gravity build The Seahorse.

Installing the engine on my 1/35 scale model scratch build science fiction anti-gravity build The Seahorse.

Installing the engine on my 1/35 scale model scratch build science fiction anti-gravity build The Seahorse.


I think it looks suitably grungy and purposeful and solid. I've toned the bright brass of the engine ring (i.e. gas stove ring originally) back a bit as well with some more staining and an overall wash.

Next up is glueing the side engine in place, and then comes the most nervewracking part of the whole build - attaching the hull to the diorama base via two upright wires that are meant to look like a cord dangling over the edge of the hull.

What am I worried about?

I'm worried about how convincingly I can put natural bends into this wire - it's pretty solid stuff, a thick gauge was necessary to make sure it could take the weight of the whole model.

I'm also worried that the wires will bend once I do attach the whole assembly to them, and it will slowly sink! That would officially be A Bad Result.

Time to grit my teeth and just do it...

Cheers,

Dave

Friday, May 4, 2018

New video: RC Beginner's Guide - what you will need to complete your RC car build

As regular readers would know, I recently bought a radio control Tamiya 1/10 Sand Scorcher. And as regular readers would also know, I am an utter newbie beginner and know absolutely nothing about building RC models. In order to rectify this, and start to get my head around what additional extras I needed to buy, I visited Metro Hobbies here in Melbourne to speak to an expert and get my head around RC transmitters, servos, speed controllers, chargers and batteries.


Complete beginners guide to RC and what you will need to complete your Tamiya RC build


I met up with Vasco from Metro Hobbies. Vasco is an RC expert - he has his own massive RC YouTube channel - and chatted with him about what an absolute beginner needs to build and get a typical Tamiya RC car up and racing.

I find batteries in particular utterly confusing. LiOn, NiCad, voltages, sizes, Amps and all the rest are just beyond my head's capabilities. The battery section of my video is particularly useful - I wouldn't say I completely understand it yet, but I definitely know more than I did this time a week ago!

There are also some important safety tips regarding safely charging batteries, which it's good to get your head around.

We also discuss controllers, electronic speed controllers, servos, battery chargers, performance upgrades and hop-ups.

I've not done an interview video before, so I hope this is interesting to you guys. We were in the office of a busy shop, so there is unfortunately some background noise of customers chatting, phones ringing, etc. But the good news is that I've been using some new video editing software (Adobe Premiere Pro), and I was able to edit out the worst of that. Hopefully crappy audio is now a thing of the past for Dave's Model Workshop!

Plus I've got a new intro sequence at the very beginning! I can almost hear you all oooh-ing and aaaah-ing in admiration ;)

Video is embedded below, but in case that doesn't work here is the link:
RC beginner's guide - what you will need to complete your RC car build

Cheers,

Dave
P.S. A heartfelt thank you to Metro Hobbies for taking the time and working with me on this video. They're good people.


Thursday, May 3, 2018

The Seahorse - problems putting together sub-assemblies

This is where I got up to on Monday evening. The bottom engine is now installed, although it's a bit tough to see in this shot.


The Seahorse scratchbuilt 1/35 scale sci-fi anti-gravity lighthouse


I had some big dramas with the two hydraulic arms poking out the side opening. It wasn't pretty, people. First I realised that the industrial yellow poking out the side looked a bit weird - too overpowering compared to the blue and red hull around it. So I am in the process of repainting them a matching blue - what you can see here is the rust undercoat that I will show through chipping.

Then, while trying to cram the side engine assembly in through the top of the hull (because I had already put the bottom engine in) I had to snap off one of the hydraulic arms to make it fit.

I've been videoing it all, so you'll be able to hear my frustration soon! I didn't swear on camera, but it was a very, very near thing...

Cheers,

Dave


Wednesday, May 2, 2018

Balancing model making and time with family

This evening we're off to the airport to pick up my Mother-in-law, who is visiting us for a week.


I get on well with her, so all those corny old Mother-in-law jokes don't actually apply in this case. But the image above does apply - houseguests mean a lot less modelling time.

On the plus side: a lot more time with my beautiful partner.

I really love building models, but it is intrinsically an anti-social hobby. It involves many hours of sitting by yourself, not interacting with your family and friends.

Over the years I've seen a number of memes about models and wives. There are lots of unfunny, borderline misogynist "jokes" on Facebook about having to sneak your latest model purchase past the wife waiting with a rolling pin. If that's the reality of your life, it's pretty sad.

Pictured: Not actually funny.


One group I a member of on Facebook, the Scale Modellers Critique Group, sometimes cops flak for being a bit brutal and cliquey. But to their immense credit, they have a zero-tolerance policy to jokes about battleaxe wives and sneaking your latest model kit purchase home.

Anyway, what it all boils down to is this: if you have a partner and family who support and/or tolerate your modelling hobby, then you're very lucky. It is a solitary hobby, and it takes up a lot of time. But it is better than just brainlessly watching tv, and as vices go there are much, much worse ways to throw away cash and time!

I try to involve my daughter where I can, and I hope that she catches the bug and does make some models in her life, or at least develops a love of craft and building something aesthetically pleasing with her own two hands.

I won't say I've got the balance 100% right - sometimes I get a bit obsessed. Sometimes I spend too much time at the workbench.

Enjoy your hobby, but don't forget to realise how lucky you are if your significant other supports you. I know I am.

Cheers,

Dave

Tuesday, May 1, 2018

Only 38 days to go!


Aaargh! I don't know if I'm going to finish The Seahorse in time to enter it in the 2018 Australian Model Expo. 


Their website has a countdown clock showing how many days until the Expo opens.


As of today, 1st May.


I find myself checking every couple of days, and yet still surprised that it is getting so close and I still have so much to do...

Back to it,

Dave