When we left off in Part II (
click here) I had just finished chipping the paint using the Hairspray Technique.
The build continued after that. Wheels went on normally at the rear, but I wanted to make the front wheels have more of a dynamic feel - I had decided that this jeep deserved a diorama base, it wasn't just going to be a static single model. Sadly, the kit did not allow posing the front wheels, which required some surgery to the front axle and some new suspension to be scratchbuilt.
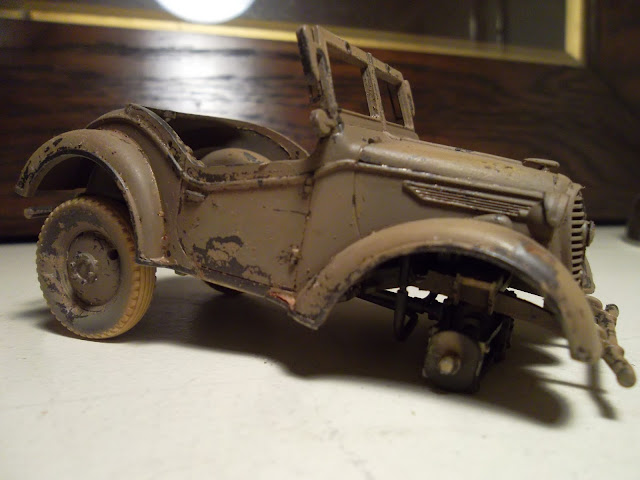 |
| Back wheels? Fine. Front wheels? That axle ain't turning nowhere. |
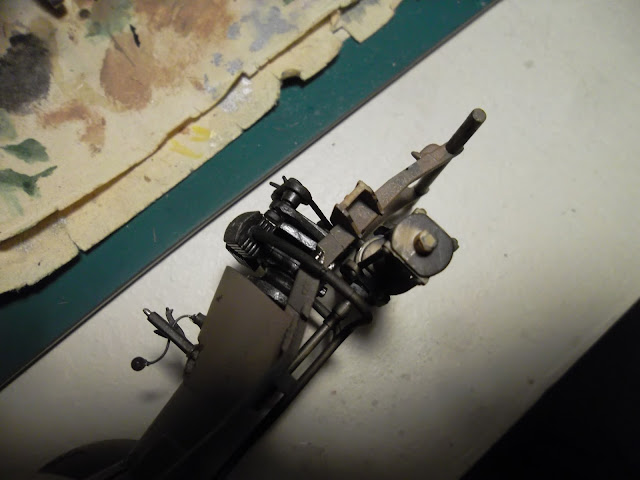 |
| Such a pity that cute little air-cooled engine will never be visible. |
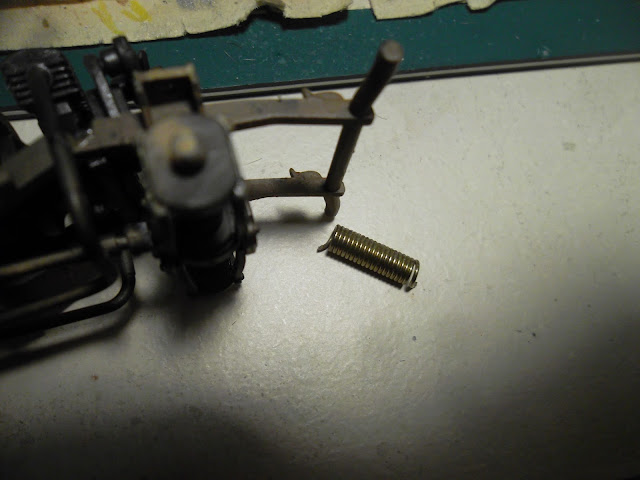 |
| Make your own suspension springs. |
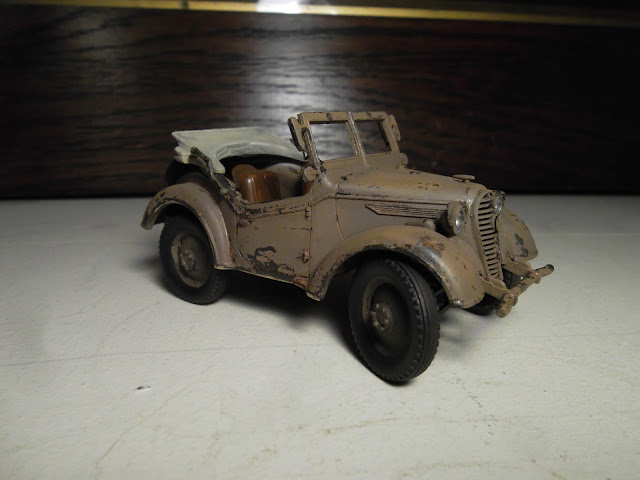 |
| Some minor axle surgery, and the front wheels turn - hooray! |
Then I finished the interior: seats, controls, etc, as well as installed the folded-back canvas hood (more on the hood later...). I tried scaling down a photo of a real Kurogane's instrument panel and printing the dials on A4 paper. Then carefully cutting them out and sticking them in. I wouldn't say it was a complete success, my printer just doesn't have that resolution, but it was an interesting exercise.
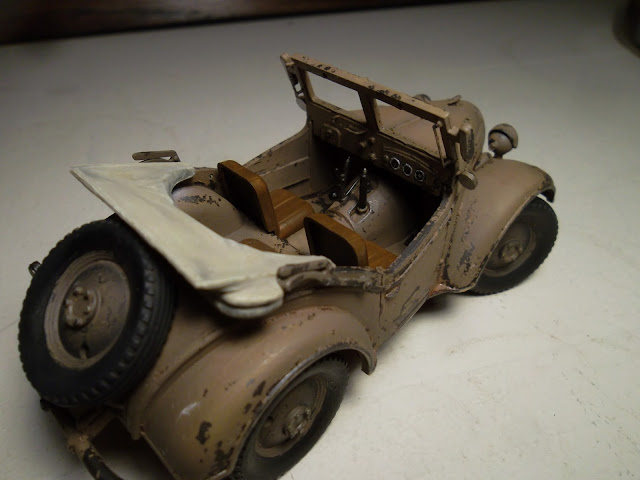 |
Interior in position. I left the steering wheel out at this stage because I knew it was going to be a tight fit fitting the driver.
You can also see the gauge dials I printed on paper and stuck in - not amazing, but worth a shot. |
Next up: planning the diorama. I had an idea that I wanted to make a very dramatic scene, full of movement and energy. I wanted to tell a story of a Japanese patrol who ran into an Allied ambush, and had to beat a hasty retreat. I always sketch my diorama ideas, to really finesse it before committing to the idea. Even if you're no great artist, this step is essential - planning saves time in the long run, plus it's exciting to see your ideas coming together when your actual model may be a long way from completion.
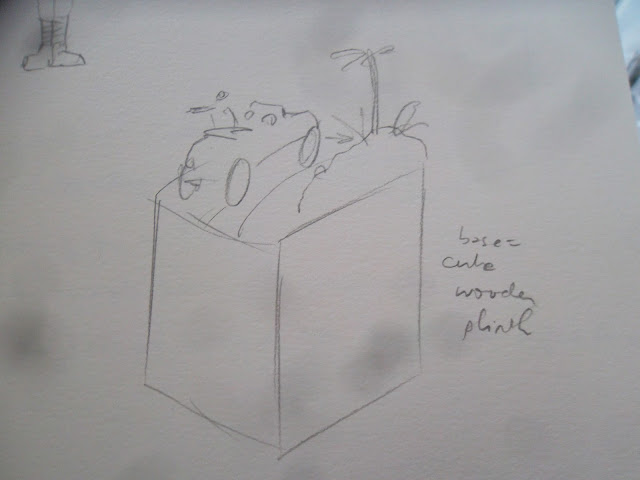 |
| First ideas of the tall plinth base. |
 |
| A little like Leonardo's sketchbooks. |
Then I started the figures. The Kurogane staff car is a weird little thing, it has three seats: two in the front and one in the back. The two figures seated in the front came with the kit, and they are crazy under-scale - maybe deliberately so to make them fit within the tiny vehicle. I also purchased a figures kit: 1/35 Japanese Imperial Marines, Tarawa, November 1943 by Master Box (kit # 3542). It is a great kit, I highly recommend it - really beautifully sculpted, and full of detail. I wanted to use the officer figure as my third passenger, and with some tweaking he would be firing a pistol at the pursuing Allied troops.
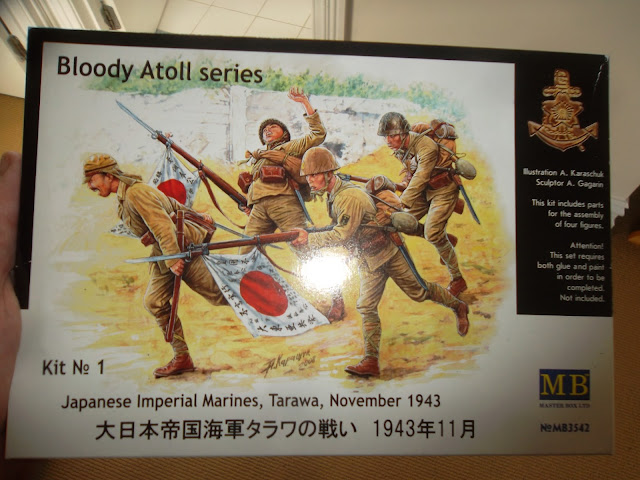 |
| A great kit - recommended. |
 |
| This is the officer I wanted to adapt. |
Here is the first trial of the figures in position, a dry trial to make sure they fitted and told a coherent story. The heads supplied in the vehicle kit were woeful, no expression at all, so I replaced the two front figures' heads with ones from the excellent Masterbox kit, full of emotion and expression. I also decided here to make the front passenger wounded, to add to the drama.
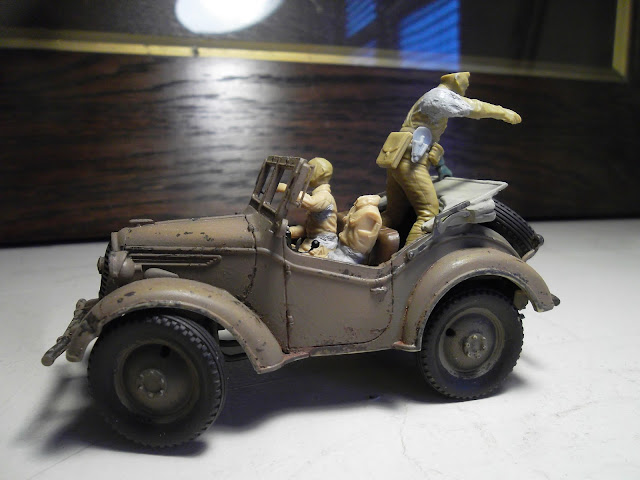 |
| You can see the putty work involved in tweaking the poses of the figures. |
 |
| Look at the scale difference in the torsos between the standing Masterbox figure and the 2 x vehicle kit figures seated! |
 |
| Drama! Drama! Drama! |
Come back for Part IV where I concentrate on the figures, and work out how to get even more life and motion into this diorama.
Until next time!
Cheers,
Dave


No comments:
Post a Comment