Monday, May 8, 2017

Adding detail to the Mustang's wheel wells

More scratch building! It's fiddly, but I keep telling myself that this is the bit I enjoy the most.


Yep, just keep telling yourself that as you wrap a 1mm wide piece of masking tape around a 1mm diameter wire.

This is the bit that you like.

Masochism.

Cheers,

Dave


Friday, May 5, 2017

Video tutorial: How to add scratch built added detail to a cockpit

At last!  It came in at 33 minutes long!


My masterclass tutorial on how to superdetail a scale model aircraft cockpit is now available on YouTube.

In this video I show you how to elevate your model cockpit, from a boring kit-standard version to a chock-full-o'-detail version, using mostly wire offcuts and spare bits of styrene strip and rod.  It is a cheap, effective, and personally satisfying way to make the pilot's office a much more professional looking piece of your model.

Cockpits are usually the most visible bit of detail on a plane. Certainly for a P-51D Mustang, with it's gorgeous but very open bubble-top canopy, you need to make sure you do justice to the cockpit.

My kit is the ancient Hasegawa 1/32 P-51D Mustang.  Just check out the difference a little judicous scratch building can make by comparing the kit-standard cockpit below.

How to scratch build cockpit detail on a Hasegawa 1/32 P-51D Mustang scale model
Scratch building detail makes a BIG difference...

So get comfortable, relax, and enjoy the video. I hope it is full of inspiring ideas for your own builds.

Cheers,

Dave


Thursday, May 4, 2017

My longest video tutorial yet is uploading tonight

Whew, it has been a long time coming. The "how to superdetail a cockpit" video tutorial has been edited, and I will upload it to YouTube tonight.


Full details tomorrow!

Let's just say that at over 30 minutes long, it is pretty comprehensive.

Cheers,

Dave

1/32 P-51D Mustang cockpit
The fuselage halves are finally together!

Sunday, April 30, 2017

Almost finished the Mustang cockpit

It's been a long haul, with a lot of things in everyday life meaning I didn't have much time for modelling in the last week and a half (freelance design jobs, visits from the in-laws).  But I have almost finished the Mustang's cockpit.


Here are a couple of teaser shots before I release a video in the next few days.


1/32 Hasegawa P-51D Mustang cockpit super detailed

1/32 Hasegawa P-51D Mustang cockpit super detailed

1/32 Hasegawa P-51D Mustang cockpit super detailed


Cheers,

Dave

Wednesday, April 26, 2017

Video tutorial: How to scratch build detailed seatbelts and harness for an aircraft cockpit

As part of my build of the 1/32 Hasegawa P-51D Mustang, I have been working on detailing the cockpit. It’s an old kit, originally released in the 1960s, and under that big ol’ bubble-top canopy the undetailed pilot’s seat is going to look a bit bare – there are certainly no photoetched seatbelts in the kit; it doesn’t even hint at a harness in the moulded plastic of the pilot’s seat. That means it’s time to scratch build your own.


Luckily, I have an amazing technique for scratch building seatbelts, and so this has been the subject of my latest YouTube video tutorial.

The best thing about this technique is that you will not have to go out and purchase any new materials. Even the most basic model-makers’ toolbox will contain everything you need: plain old masking tape, and some thin, malleable wire.


That's right. Plain masking tape and wire.


I won’t lie: it is a slightly time-consuming technique until you get a mini production-line thing happening. But my god, is it a satisfying process, and the more you do the faster you get. And the result is a highly detailed, realistic, textured pilot’s harness that you will love. It will superdetail the office of any warbird you’re building, and the result is 100% personalized to your kit – nobody else will have that exact seatbelt.

BEFORE - I found this image by another modeller online - this is what the bog-standard kit looks like without any scratch building detail.

How to scratch build seat belts for scale model aircraft
AFTER - And this is what a little scratch building can do!


This process is totally customizable as well: it would also work for cars, sci-fi spaceships, anything that requires seatbelts.  And the colour can be tailored to any historically-accurate colour you want.

This took me about an hour from go to whoa, but that included fiddling about with cameras, lighting and focus – without that, I guess I could have had all four belts made and mounted in about 40 minutes.


How to scratch build seat belts for scale model aircraft
How good does that look? It's a great little technique.


Give it a try. You’ll feel a million bucks when you sit back and admire what a difference it makes.

Cheers,


Dave


Tuesday, April 25, 2017

ANZAC Day

Here in Australia and New Zealand we observe ANZAC Day every 25th April. It is a chance to reflect on war and sacrifice, and thank those who serve our country.


Sometimes it's a bit too easy to get caught up on the machines and equipment when modelling military subjects, and it is easy to forget the gruesome reality that most of what we build are weapons expressly designed to kill and maim human beings. It's good to take a moment to remember that now and then.

For information on ANZAC Day - Wikipedia article here.

Here is an astounding model in the Te Papa museum in Wellington, New Zealand. It is from an exhibition commemorating New Zealand's involvement in World War I. The figures are 2.4 times normal human size (so that scale would be 2.4/1) and were built by Weta Workshops, a company which also worked on Peter Jackson's Middle Earth films. Truly outstanding modelling.

Source.


Lest we forget.

Monday, April 24, 2017

I finally purchased a 1/35 Tamiya Panther Ausf.G tank for my next project

On the weekend I visited Hobby HQ again, the excellent model shop in the northern suburbs of Melbourne which is soon closing down (I’ve mentioned it on my previous visit here).  I caught up there with my friend Ian and his mate Dave - you can never have too many Daves at any social event.


The good news

The good news is that I finally purchased a 1/35 Panther tank kit!  I have been wanting to build a Panther for ages, and it was on my 2016 Christmas model wish list.

I did a bit of research beforehand. I knew I wanted to build a Tamiya kit, because Tamiya are just my favourite kits to build. Perfectly engineered, they go together a dream, and the level of detail is just right. Not too fiddly with insane photoetch (I’m looking at you, Bronco models), but no compromise ending up with an over-simplified toy (ahem, yes, you two, Revell and Italeri).

I ended up knowing that I wanted a Panther Ausf.G for several reasons:
  • it is a fairly recent kit (the kit was first released in 1995 but this version is a recent update).
  • it is a good looking machine.
  •  I didn’t want to have to deal with Zimmerit – partly because I don’t like the way it looks, and partly because it is a pain in the arse to model well.
  • The two figures included in the kit tell an amazing story fresh out of the box. The diorama is begging to be built.
So now Tamiya 1/35 scale model Panther Type G (Tamiya code 35176) is mine!

35176 Tamiya 1/35 Panther Type G scale model and photoetch
Ooh, I can't wait to make this good and dirty. That sounds so wrong...


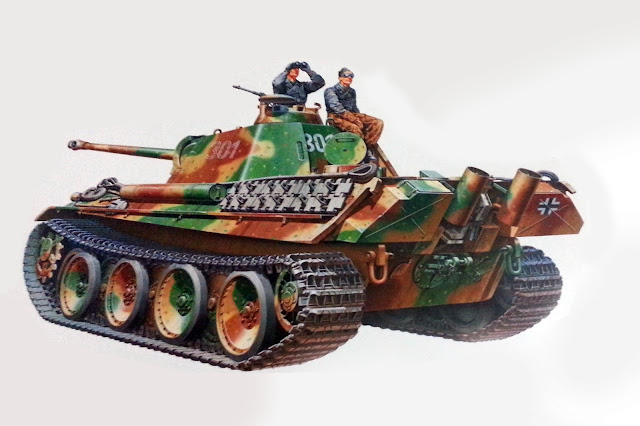
Box art for 35176 Tamiya 1/35 Panther Type G
Brilliant box art by Tamiya.


I also picked up the accompanying photoetched engine grills because they were there and the price was right.
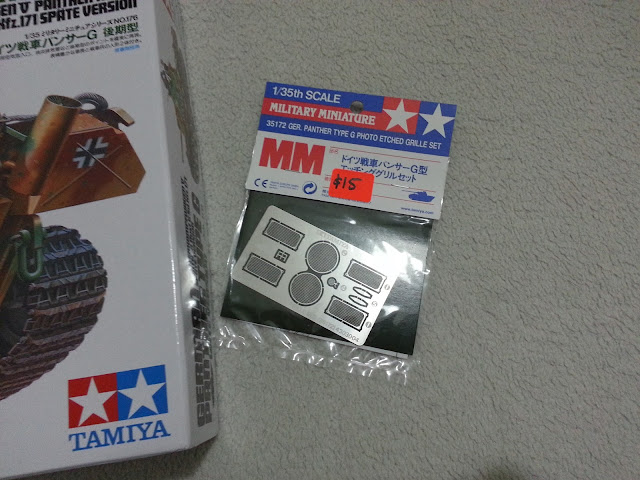
35172 Photo etch grills for Tamiya 1/35 Panther G
Why not, eh?


The bad news

The bad news is that I’ve now added this damn fine kit to my stash. My ever-growing stash. How is that bad news? My spare time is so limited, and my output so slow, that I don’t know when I’m going to get time to build all the amazing kits in my stash. Sort of a good problem to have. 

As of today, I want to build this Panther so much, but I have a strict self-imposed policy of not having multiple builds on the go at once, so it will have to wait until the Mustang is completed. (I like to obsess over my current build, and more than one on the go at once dilutes that. Plus if you've seen my videos you know how messy my workbench is - two kits at once, forget it).


The great news

Ian bought a 1/35 Elefant tank, and it came as a package deal with a set of three wounded German figures. He doesn’t like building figures, so he donated them to me. Sweet, thanks Ian!

Not a bad little weekend outing.


So yep, that’s my next project sorted. Perhaps this will give me inspiration to finish the Mustang a bit quicker.

Cheers,

Dave

Saturday, April 22, 2017

Nearly 1000 subscribers on YouTube!

I just noticed that I'm almost at the magic 1000 subscribers to my YouTube channel. 1000!!! Wow. As of right now it's at 982.


I'm humbled and exceedingly chuffed that nearly 1000 people think my videos are worth coming back to.

Thanks to everyone who has subscribed. And if you haven't already, here is where you can check out my YouTube channel and subscribe as well.

Thanks people,

Dave


______________________________________

UPDATE - 24 April 2017:


We have hit the 1000 mark - thanks people!!! That is just brilliant. Here's to many, many more videos to share with you all.

Dave