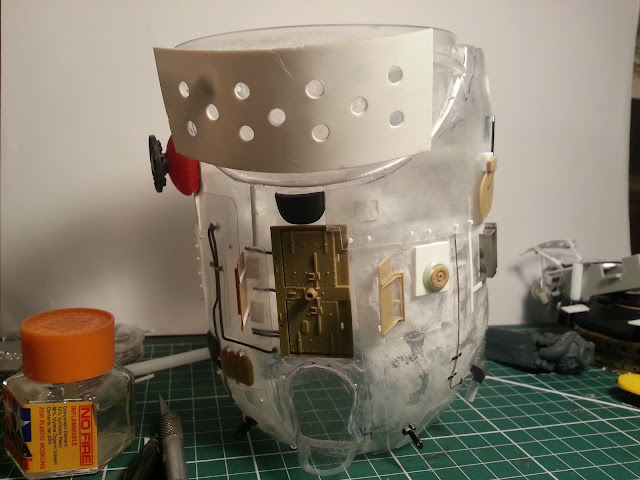
With all the preparations for my trip to Japan, I've not done a great deal of work on The Seahorse. But the hull is almost complete now. It has been a fiddly process adding various pipes and bolts and bits and pieces to make it look suitably rough and jerry-rigged.
I have to say, I have enjoyed the scratch building of the hull a lot less than I expected. Scratch building the engine module was heaps of fun, I loved putting all those disparate pieces together. But for some reason, the hull exterior has been a bit of an uphill slog...
Partly I think it because the plastic of the bottle I used is a bastard to work with. It is a little "greasy" - plastic does not want to bind to it easily. normal plastic cement does nothing to hold styrene to the bottle surface, so all items have been glued using CA glue, but even then some pieces have come off over time. As you can imagine, this makes me a little nervous - I don't want bits falling off once I have painted and weathered this bad boy...
Also, the curve of the surface has made sticking hull plates on a lot more problematic than I expected. Items running vertically up the hull are fairly okay, but anything that is remotely wide and runs horizontally around the hull is a lot trickier to get right. That has been a bit of a bugger to deal with.
Anyway, after all that I feel it's at the stage of being ready for primer. Once that is on, we will see just how many currently invisible defects are revealed by the paint!
I am also ready to paint the engine module, and start some weathering - now that will be fun compared to the hull.
I also feel pretty confident that scratch building the upper cabin will be more fun, and I'm really looking forward to adding all the various finer details: hanging chains, pipes, ropes, etc will be great fun and hopefully will really bring this to life.
So I might get a chance to prime and move on a little this weekend. But I'm also meant to be packing for Monday's flight to Japan - let's see what gets my priority attention!
Cheers,
Dave


Hi Dave,
ReplyDeleteThe seahorse is looking great!
One suggestion for gluing parts to the PET plastic bottle with CA is to use a surface treatment specifically design for that type of plastic. Permabond recommends using their Permabond® POP Clear Liquid Adhesive Primer. It's designed to improve the bond of CA adhesive to 'greasy' type plastics like this.
It comes in a 4oz. spray bottle.
https://www.fastenal.com/products/details/0619214
Keep up the great work!
Ken
Thanks Ken. I'll check it out, sounds like exactly what I need. Cheers, Dave
Delete